Application
This blueprint establishes meta tag labels for assets and provides an Asset Master. The Meta Tags allow assets to be filtered and analysed by labels such as Asset Class or Attached Technology or hierarchy like Site or Area, and the Asset Master lets the administrator assign a Criticality Score and Acitve Status’.
The two active selections allow the user to make an asset active or inactive in either a recommendation or drilldown page, depending on configuration.
For Data Security purposes, each grid in the application will be filtered by the Company ID associated with the UserID. This segmentation serves the dual purpose of segmenting potentially sensitve data and reducing un-needed options when sorting through data.
Asset Master
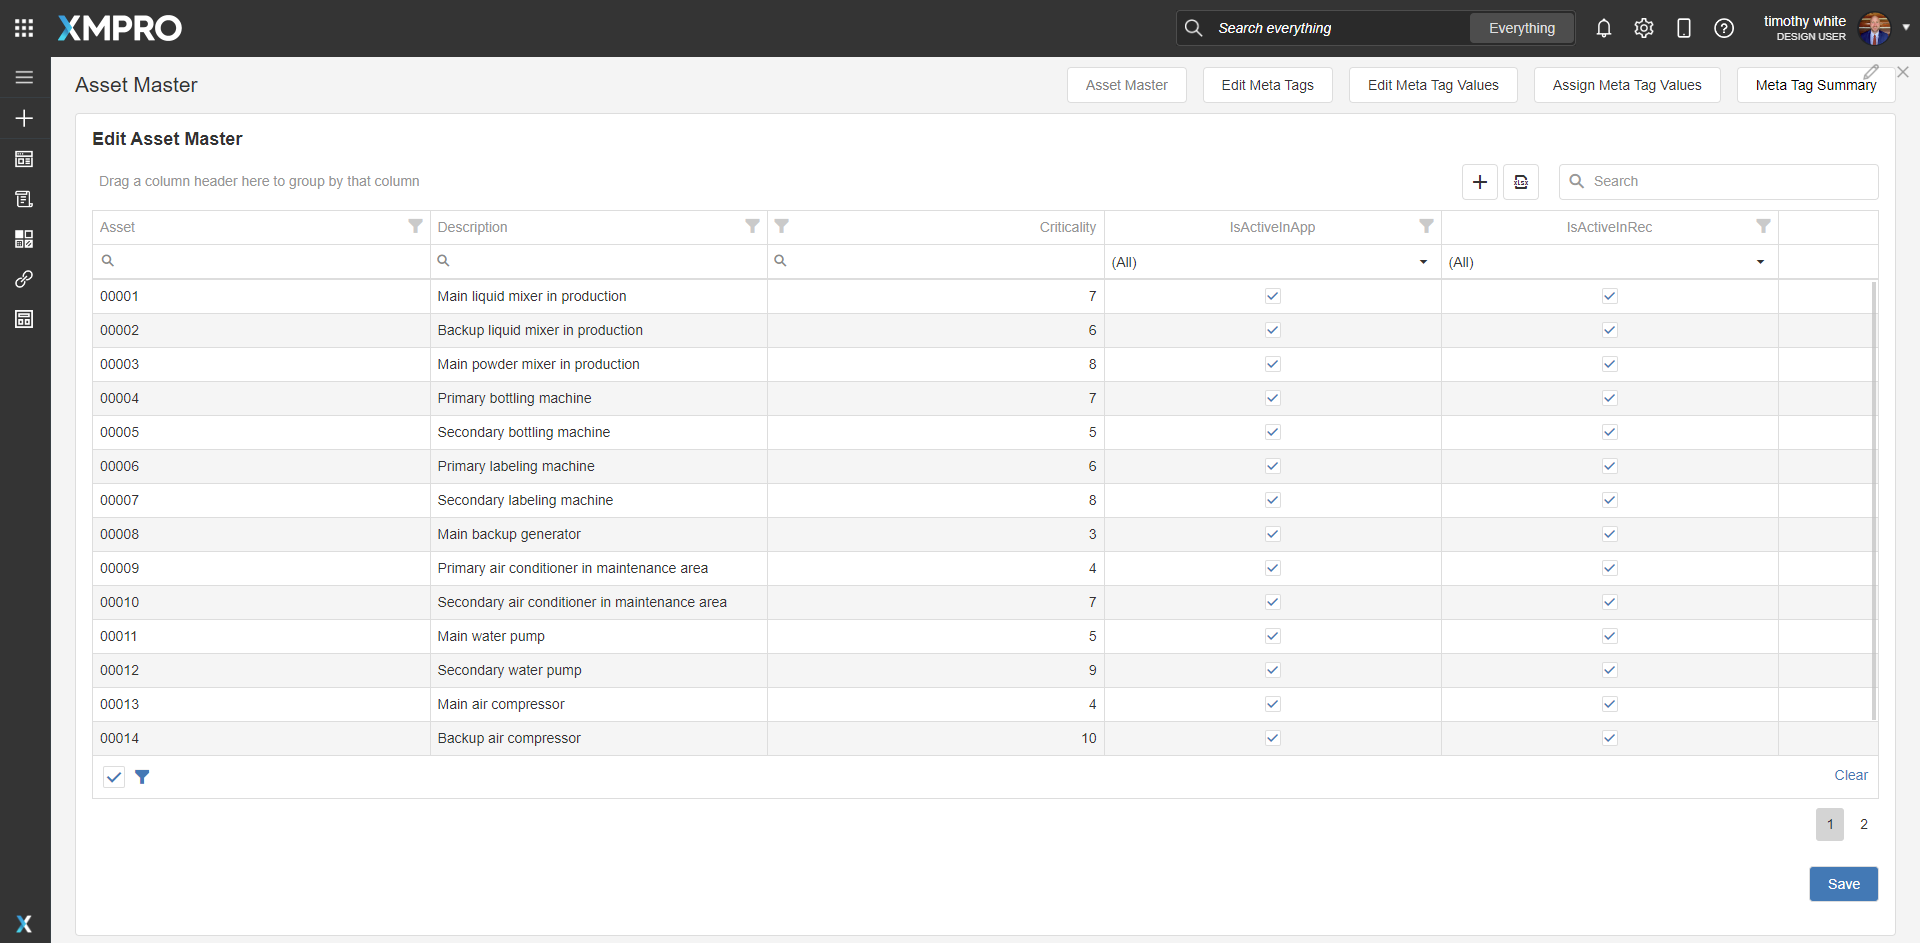
The Asset Master give the user the ability to add, remove and modify Asset, Description, Asset Criticality, and Active Status in both Recommendations and Drilldowns. The Data Stream requires a sql agent to monitor status of an asset to achieve this functionality, but the flags can be modified here.
Create Meta Tags
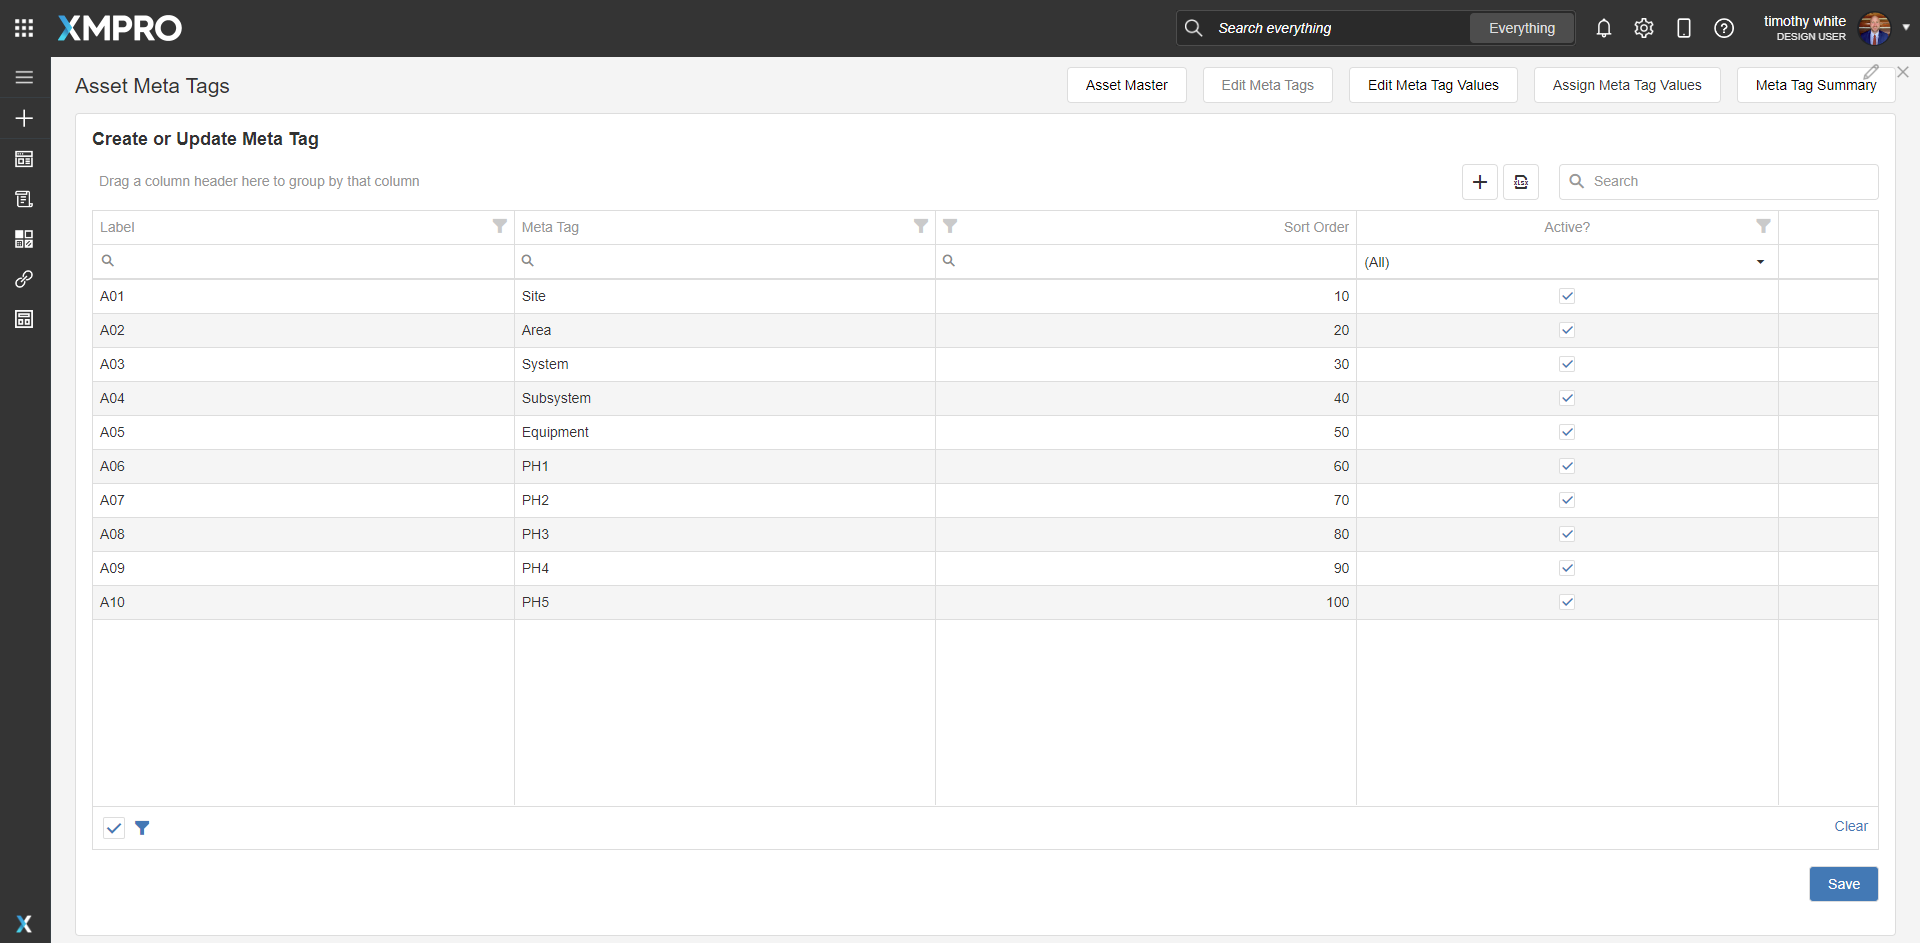
This page contains a navigation bar at the top right and a grid to edit existing Meta Tags or create new Meta Tags. The Meta Tag Type column is an additional identifier for what the Meta Tag will modify.
-
Upon creation of a Meta Tag, a corresponding Meta Tag Value of “Not Allocated” will be created using a SQL Trigger.
-
Both the Meta Tag and Meta Tag Value rows give the user the option to assign Active Status and and Sort Order.
-
Active status for both determines whether the object will be visible as an option to assign to an asset.
-
Only active Meta Tags will be available for selection to assign to a Meta Tag Value
Create Meta Tag Values
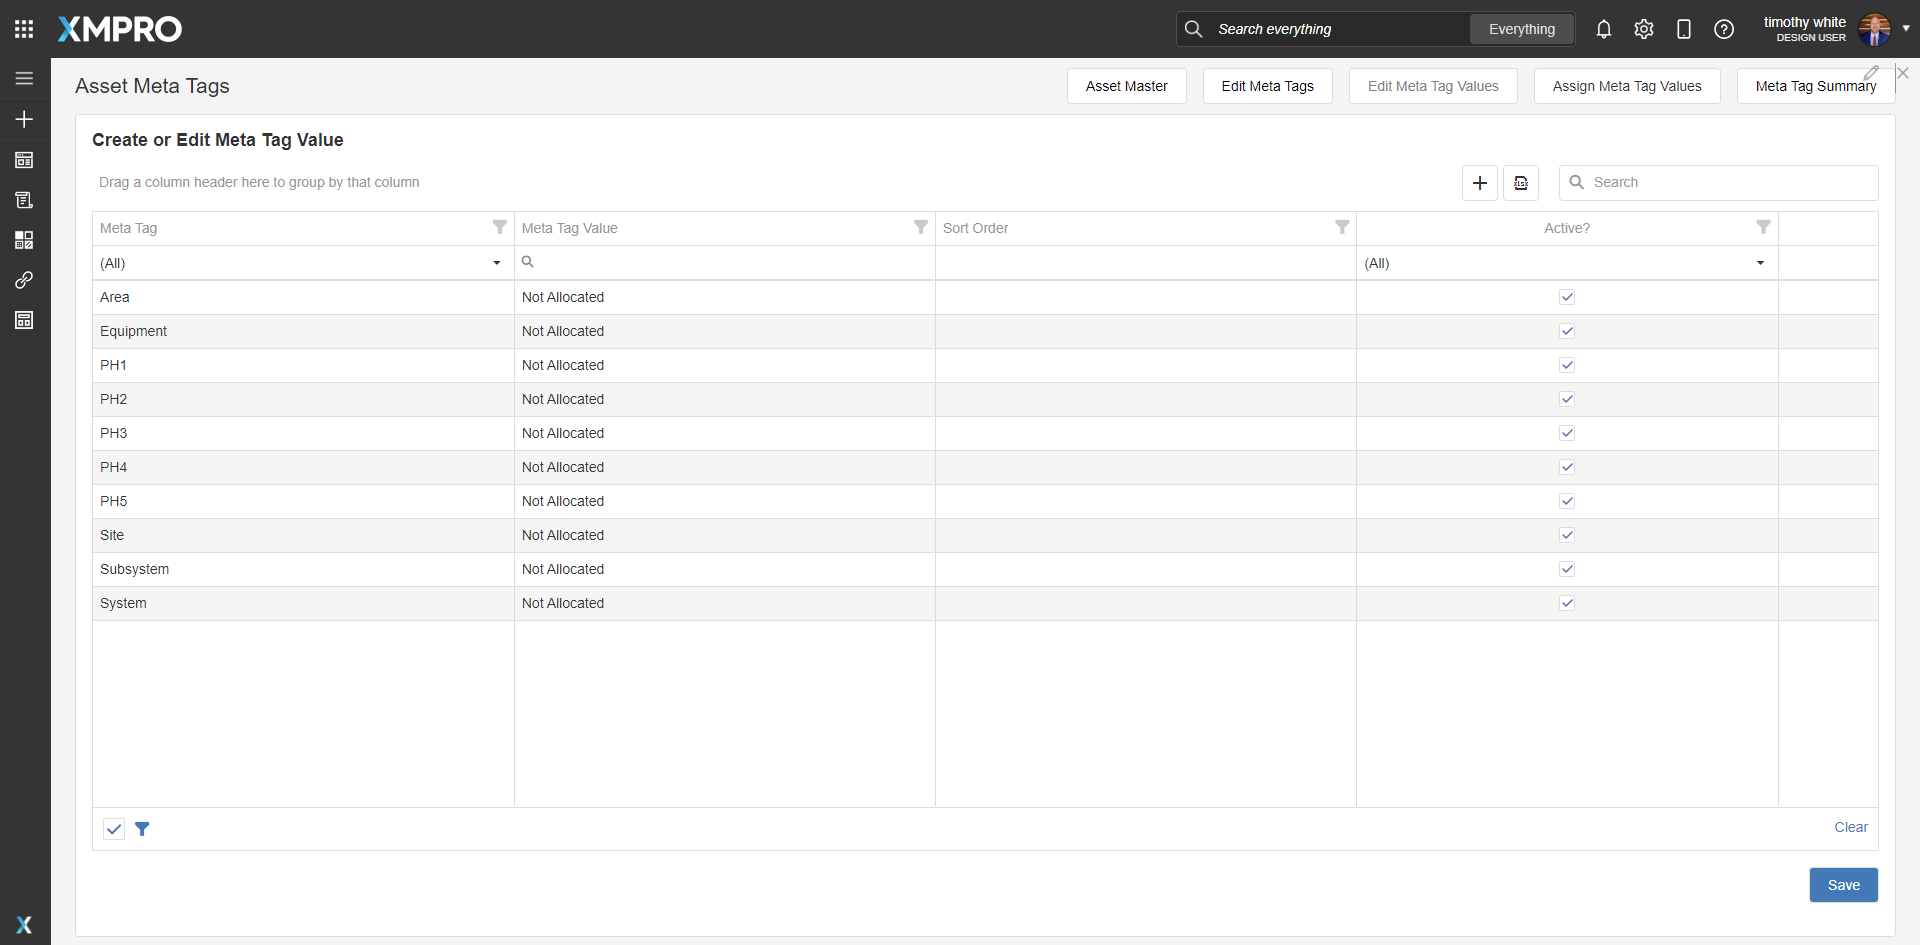
Similar to the Create Meta Tags page, the user will will click the + grid icon to add a row, then select the Meta Tag to associate the Meta Tag Value with. The Meta Tag will be a dropdown list populated by active Meta Tags, while the Meta Tag Value will be freeform entry.
Although the “Not Allocated” Meta Tag Value will exist as an option for assigning, it will not be visible in this grid to maintain data uniformity as it is the default option.
Assign Meta Tag and Label
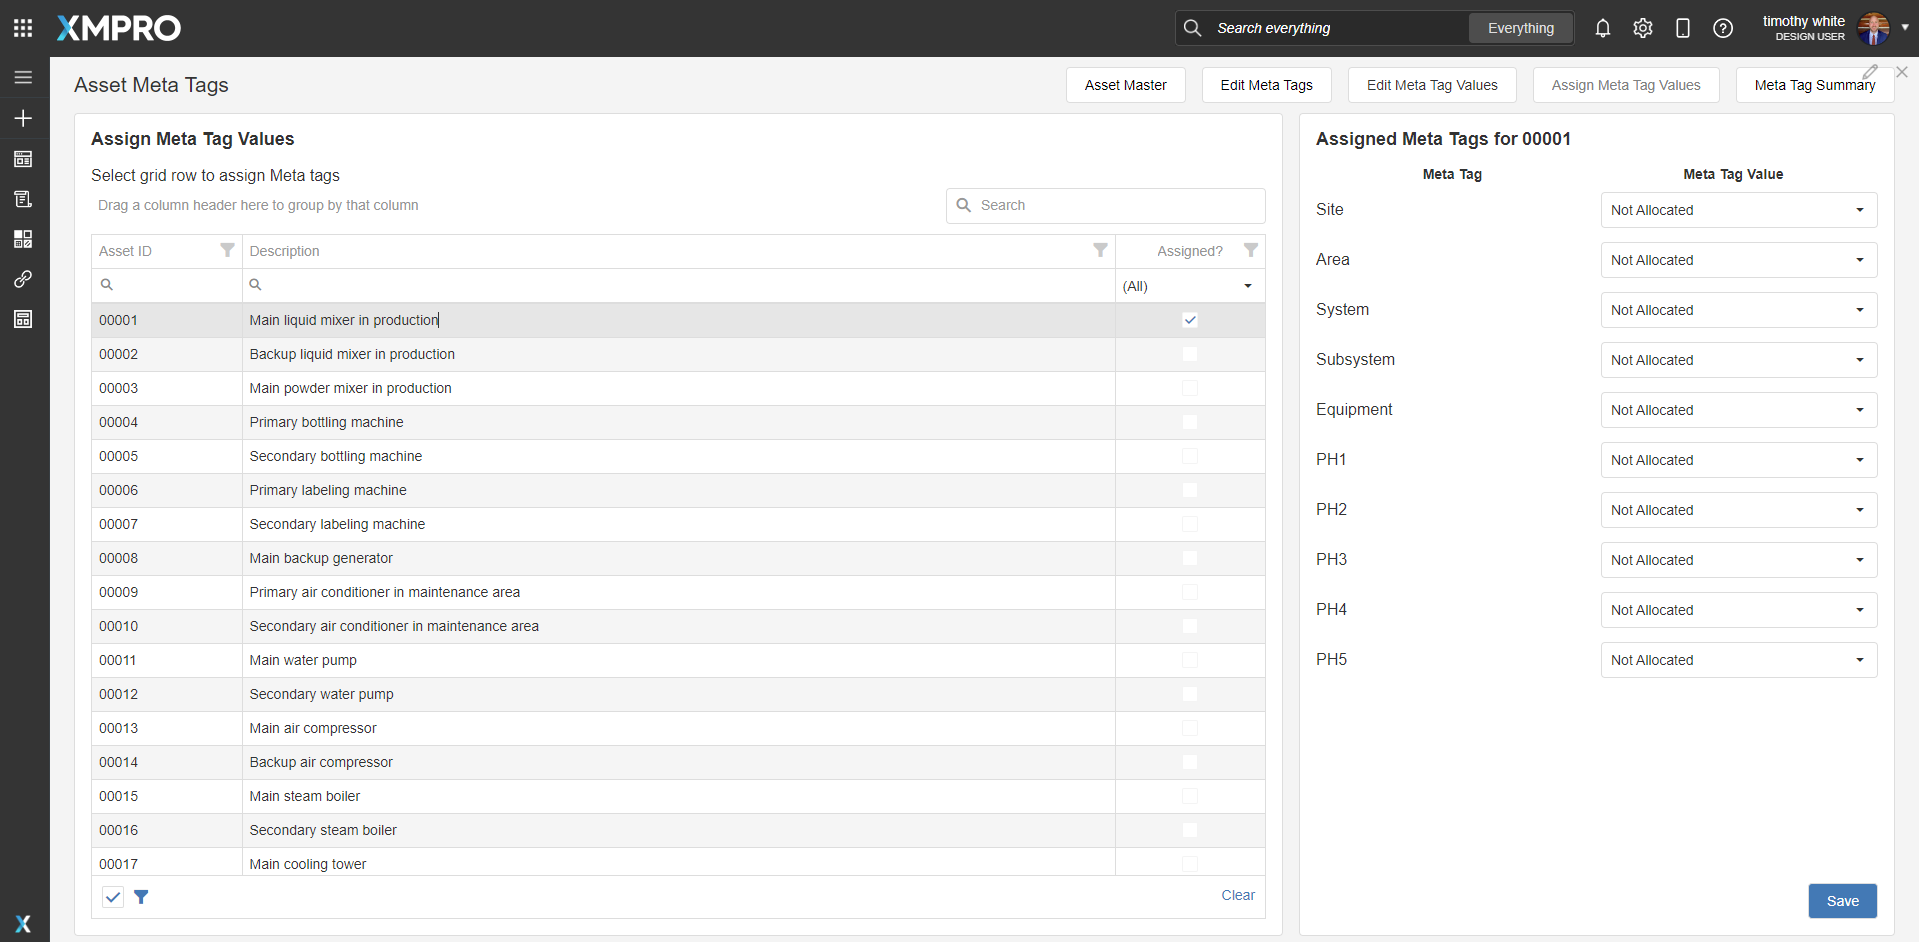
The user will click on a specific asset to assign Meta Tag Values to the asset. Dropdown menus will then appear. If the value has already been assigned, the value will appear; if not, then the value will be empty.
The user must assign all values to all tags before they will be allowed to save. By default, when a Meta Tag is created, a value of Not Allocated is also created. The user should select this option if a Meta Tag is not required for an asset as it signifies that user reviewed the entry and assigned a value.
Reference Table
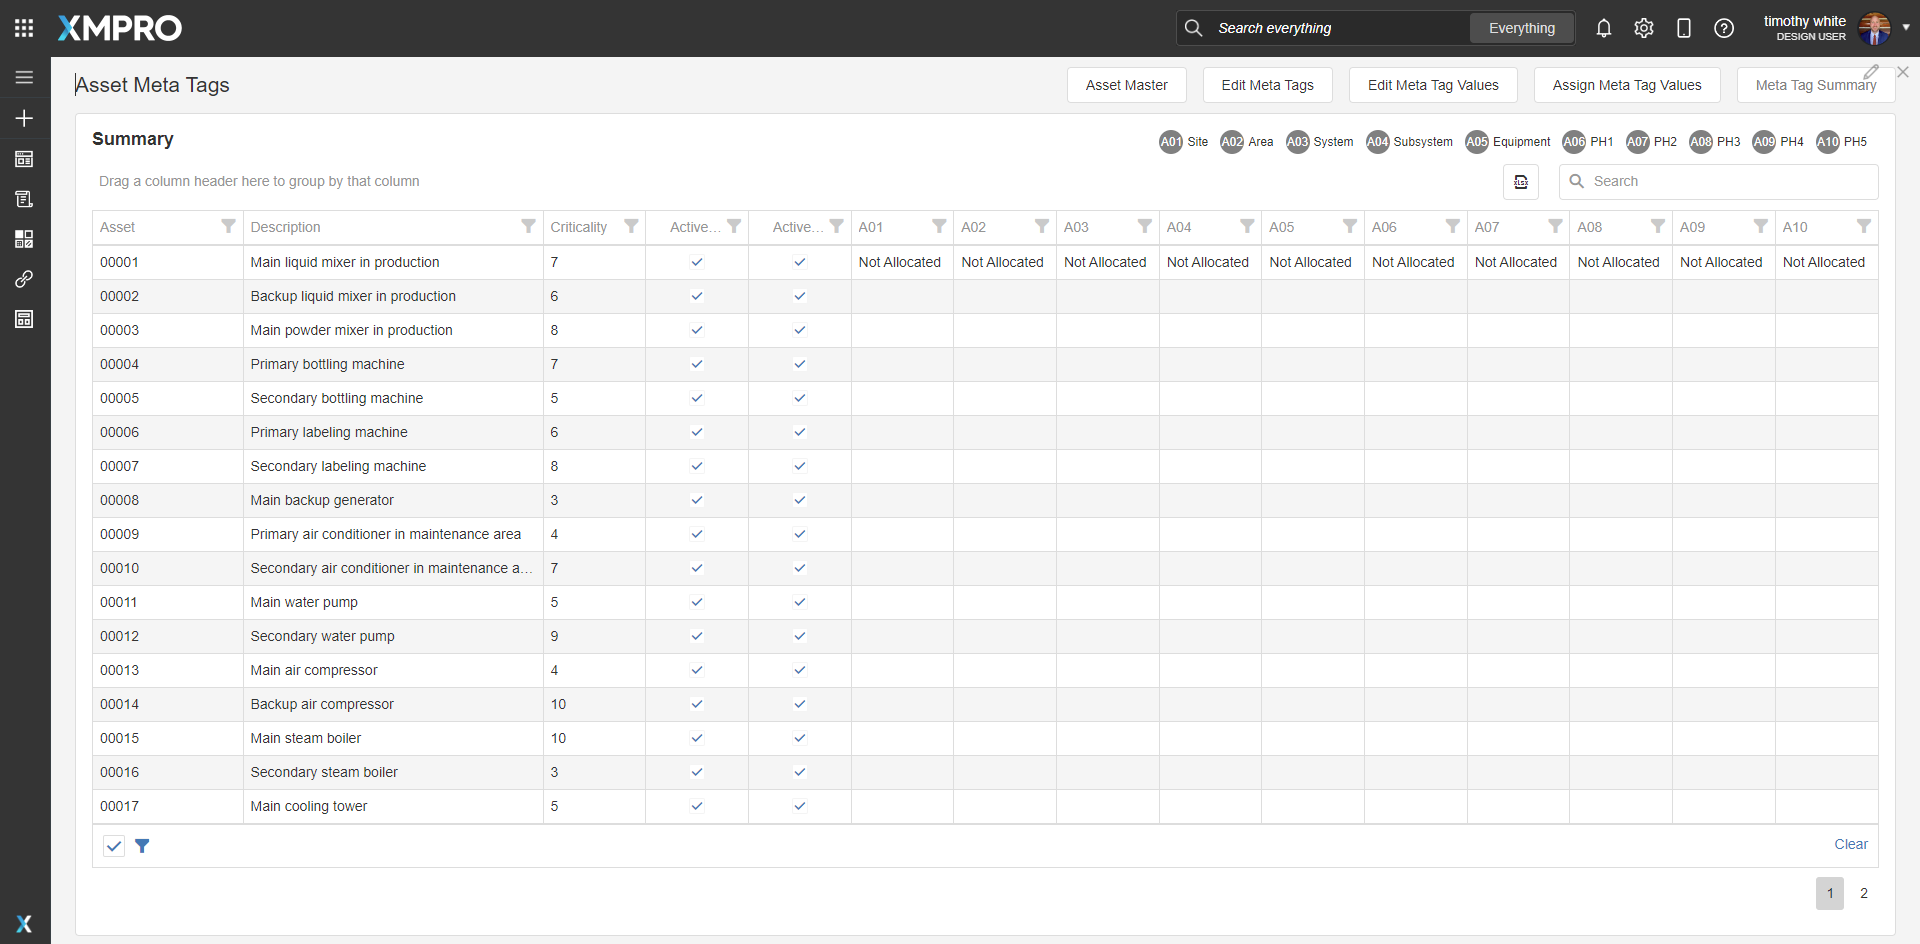
The reference Table shows shows a merging of the Asset Master Criticality and Active Status’ and the Asset Meta Tag Values assigned to an asset. This grid is read only and used strictly for reference purposes.
Steps to Import
1. Create/confirm variables
Ensure the following variables are available to be used:
- SQL Server
- SQL Username
- SQL Password (Encrypted)
2. Run SQL Scripts
- Execute the scripts sequentially in SQL Server Master Data DB
- Ensure the columns are successfully loaded into the database
- Additional customizations are required if a SQL environment does not allow for triggers
3. Import the Applications
- Assign Access to others as required

- Ensure the App Data connection properties are configured and valid
- If external Asset Master will be used, SQL statements must be ammended to point to correct tables
- Save the application
- Publish the application
- Ensure there is data in the application


