Application
This blueprint enables users to create a Shutdown Master and assign assets to specific shutdown periods. Assets will automatically activate or deactivate within the Asset Master based on the specified shutdown dates, halting alert generation during the shutdown and reactivating alerts once the shutdown ends. Additionally, users can subscribe to email notifications for shutdown start and stop events for a particular site, ensuring timely communication and coordination.
Create Shutdown

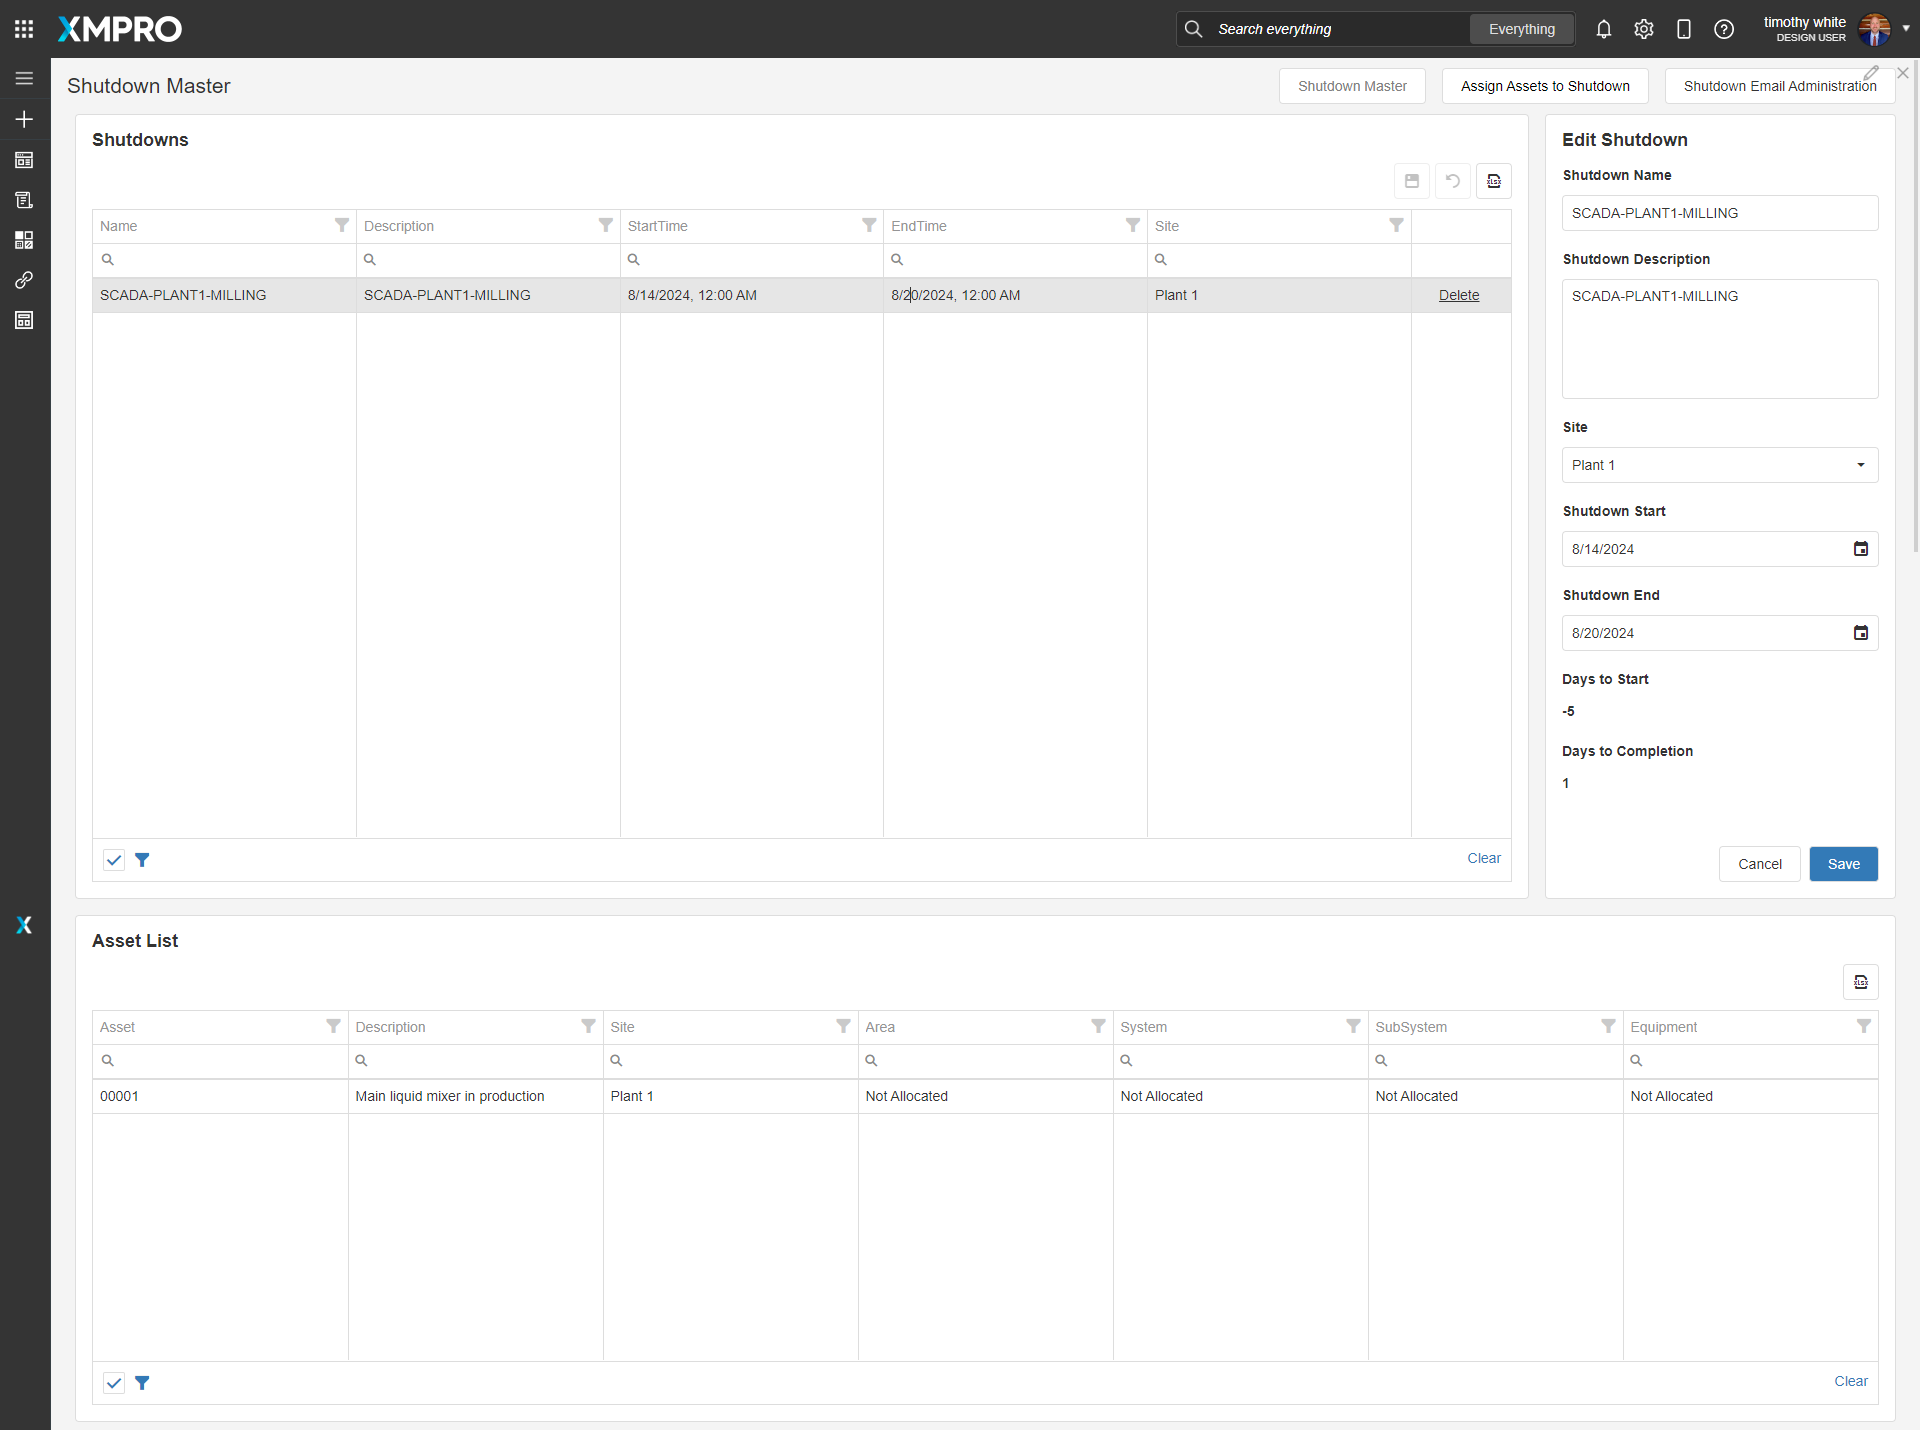
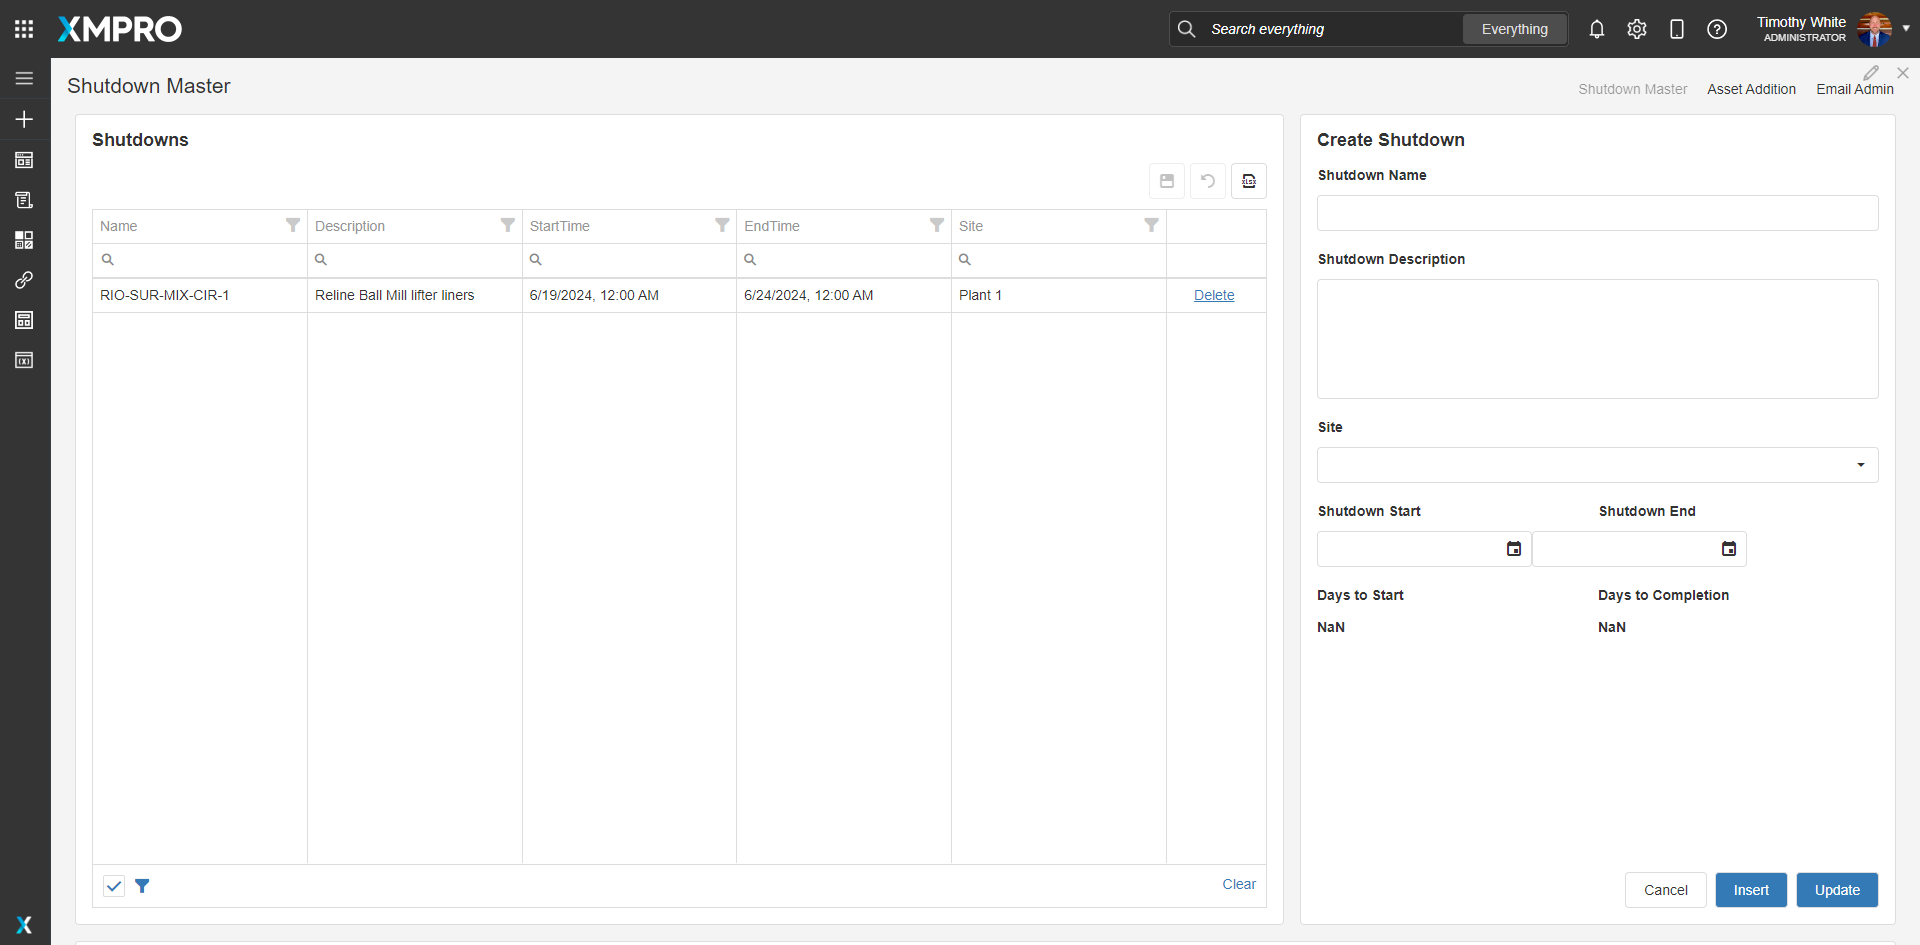
This page allows the user to create/edit shutdowns and add details such as Start/End Date. It also contains a grid at the bottom of the page that displays all the assets associated with an individual shutdown.
Assign Assets to Shutdown

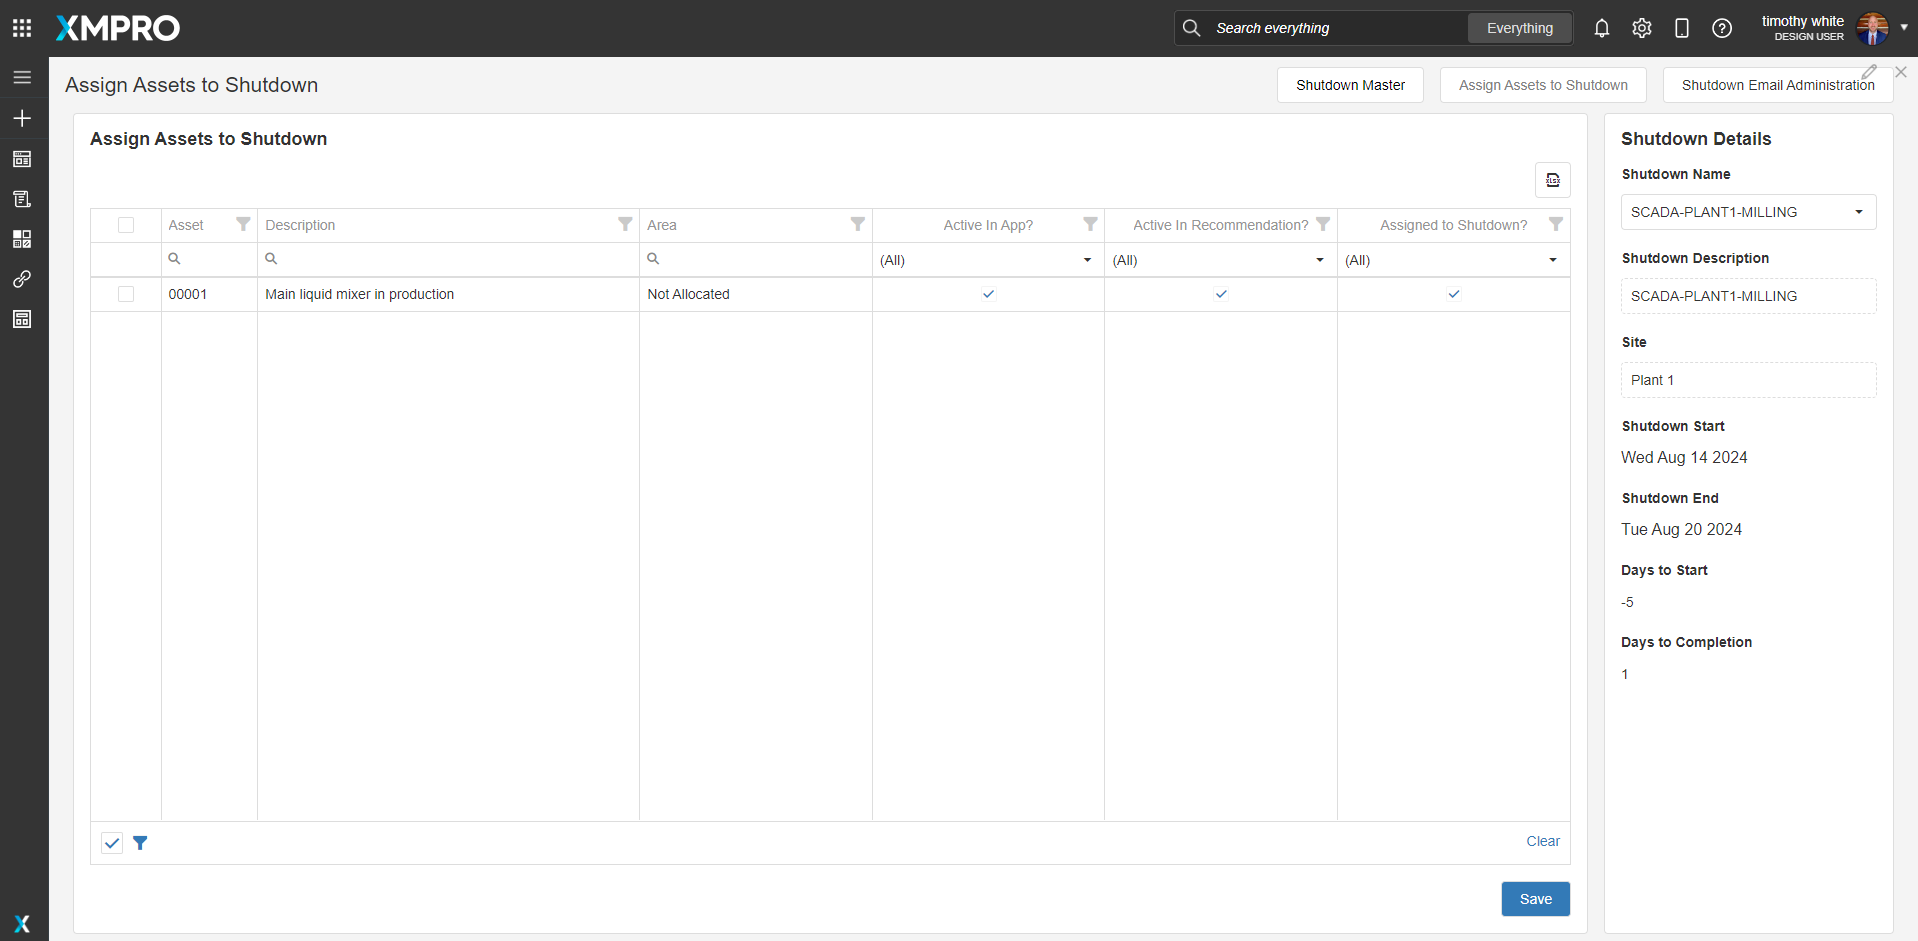
This page assigns assets to shutdowns by selecting a shutdown from a dropdown menu the assign assets to the shutdown and save. The “Asigned to Shutdown?” column shows the assets that are already assigned to the selected shutdown if any exist.
Subcribe to Email Alerts

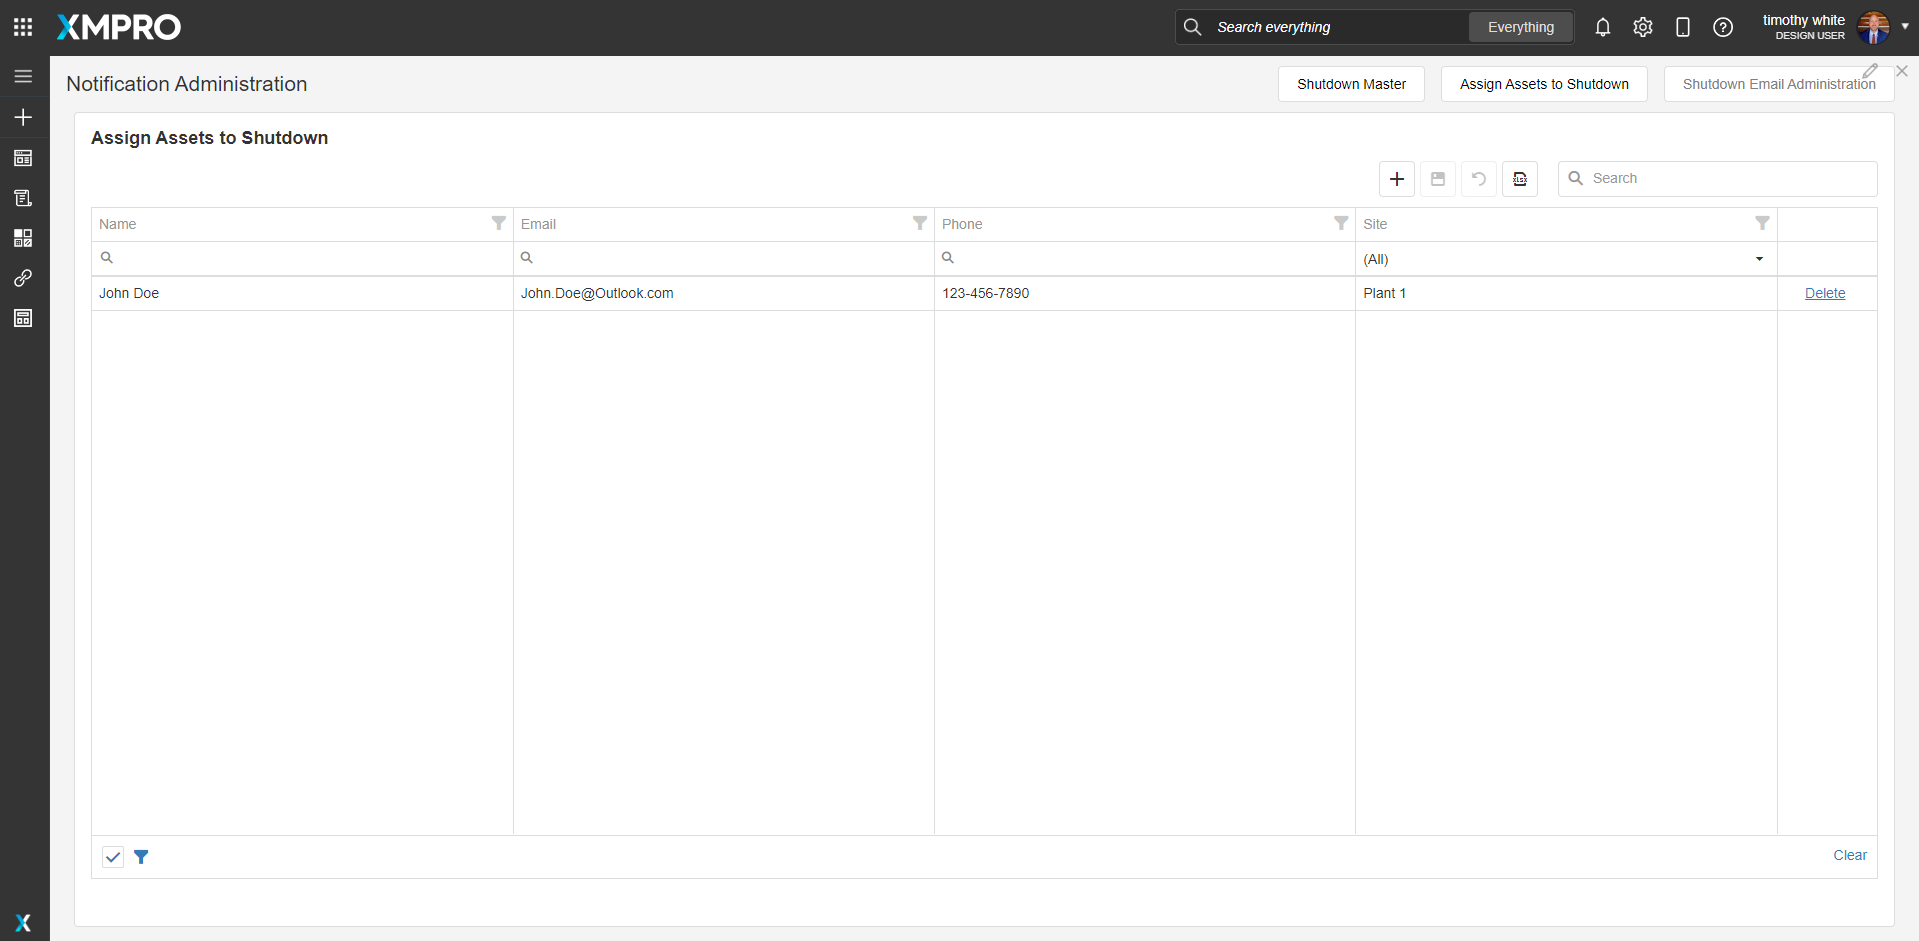
The Email Subscription page assigns alerts to email addresses by Site Level Hierarchy in the Asset Master, so the user will receive all shutdown notfications for a specific site.
Steps to Import
1. Create/confirm variables
Ensure the following variables are available to be used:
- SQL Server
- SQL Username
- SQL Password (Encrypted)
2. Run SQL Scripts
- Execute the scripts in SQL Server Master Data DB
- Ensure the data is successfully loaded into the database
- The data must be formatted in accordance with the existing Asset Master Hierarchy.
3. Import the Data Stream
- This Data Stream performs two functions: activating and deactivating Assets in the Asset Master and generating email alerts for start/stop based on the Email Administration Page
- As the solution stands, the Data Stream will notify users subscribed to a site of any shutdown in that Site Hierarchy 2 days prior two start and 2 days prior to end
- The site administrator will need to have an available SMTP server set up, to take advantge of automatic email capabilities within the Data Stream
4. Import the Applications
- Assign Access to others as required

- Ensure the App Data connection properties are configured and valid
- Save the application
- Publish the application


