Use Validation
Validation is a way of making sure the user has correctly entered data when they are filling out a form. The Validation occurs when they press the submit button. This prevents the user from submitting data that is inaccurate or in the wrong format.
Note
It is recommended that you read the article listed below to improve your understanding of Applications.
Adding Validation to Forms
To add Validation to forms, follow the steps below:
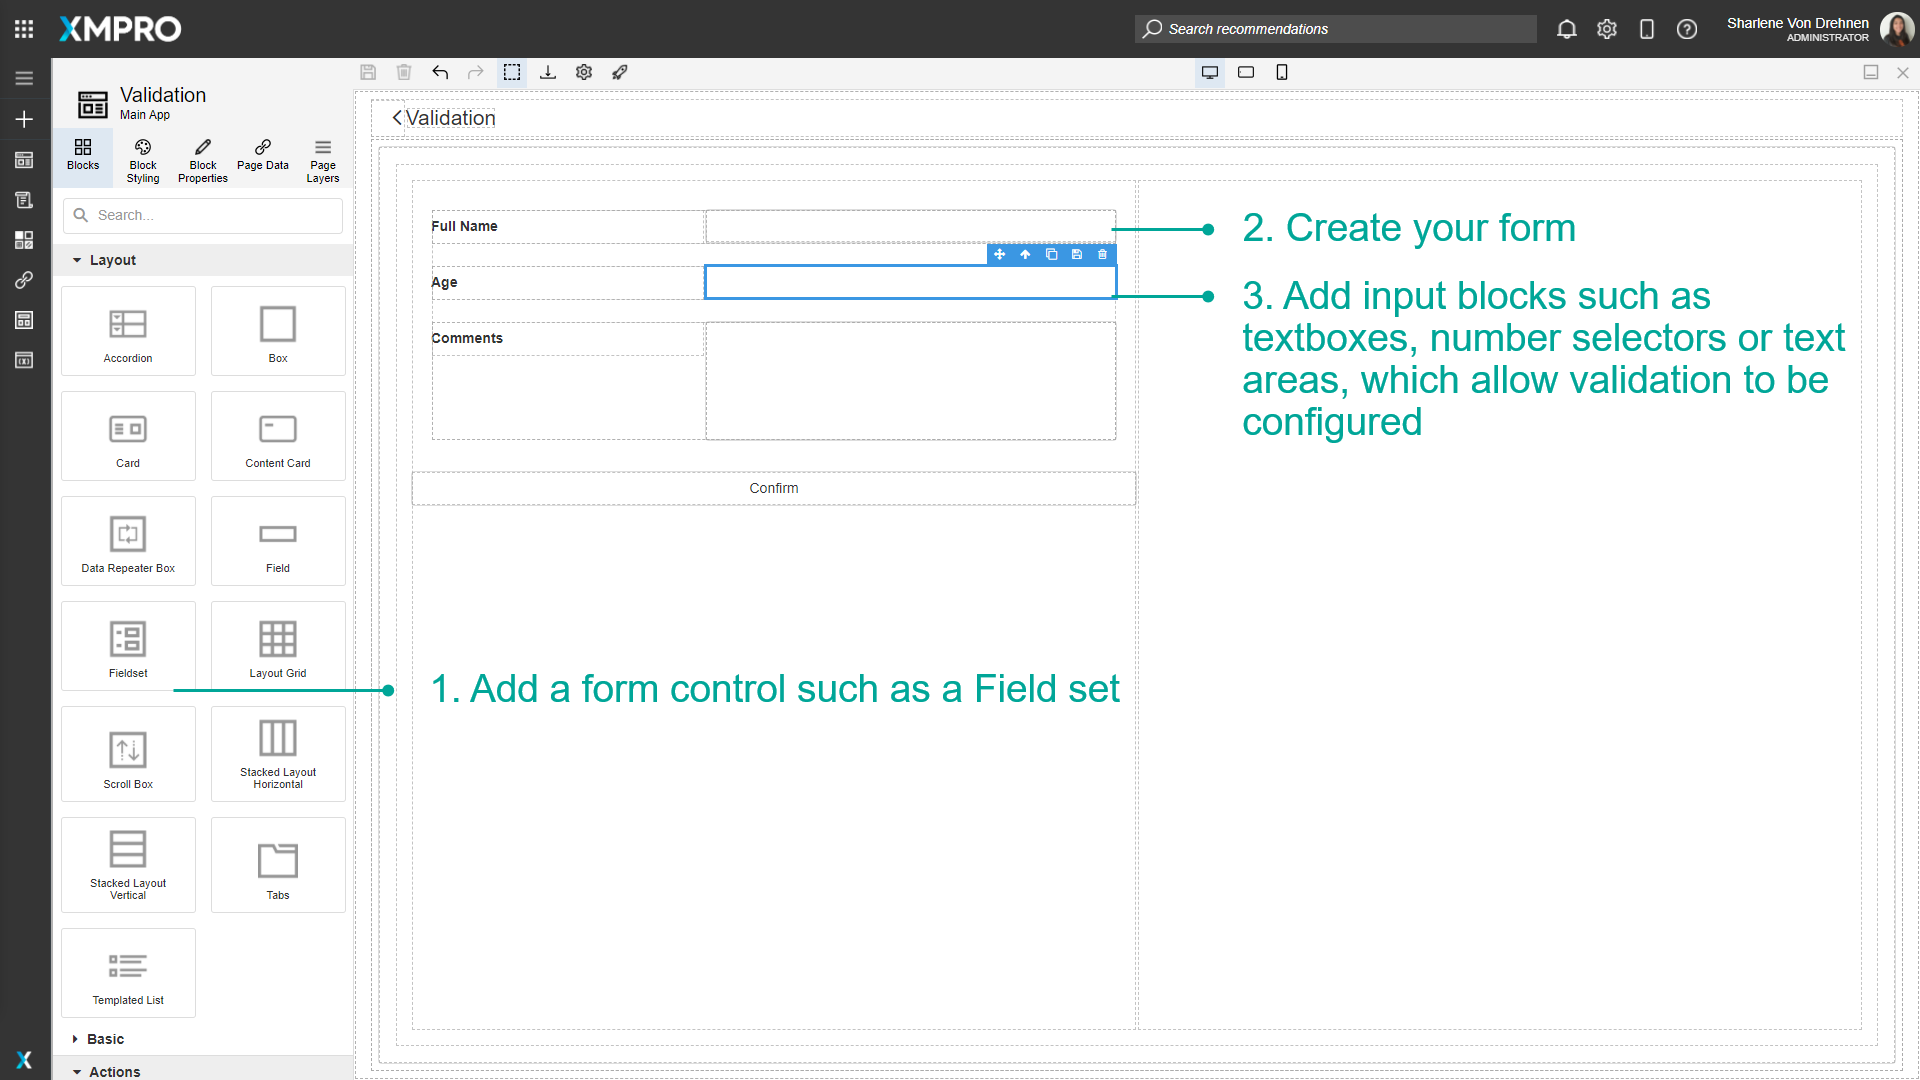
Add a form control such as a Fieldset.
Create your form.
Add input blocks such as textboxes, number selectors, or text areas, which allow validation to be configured.
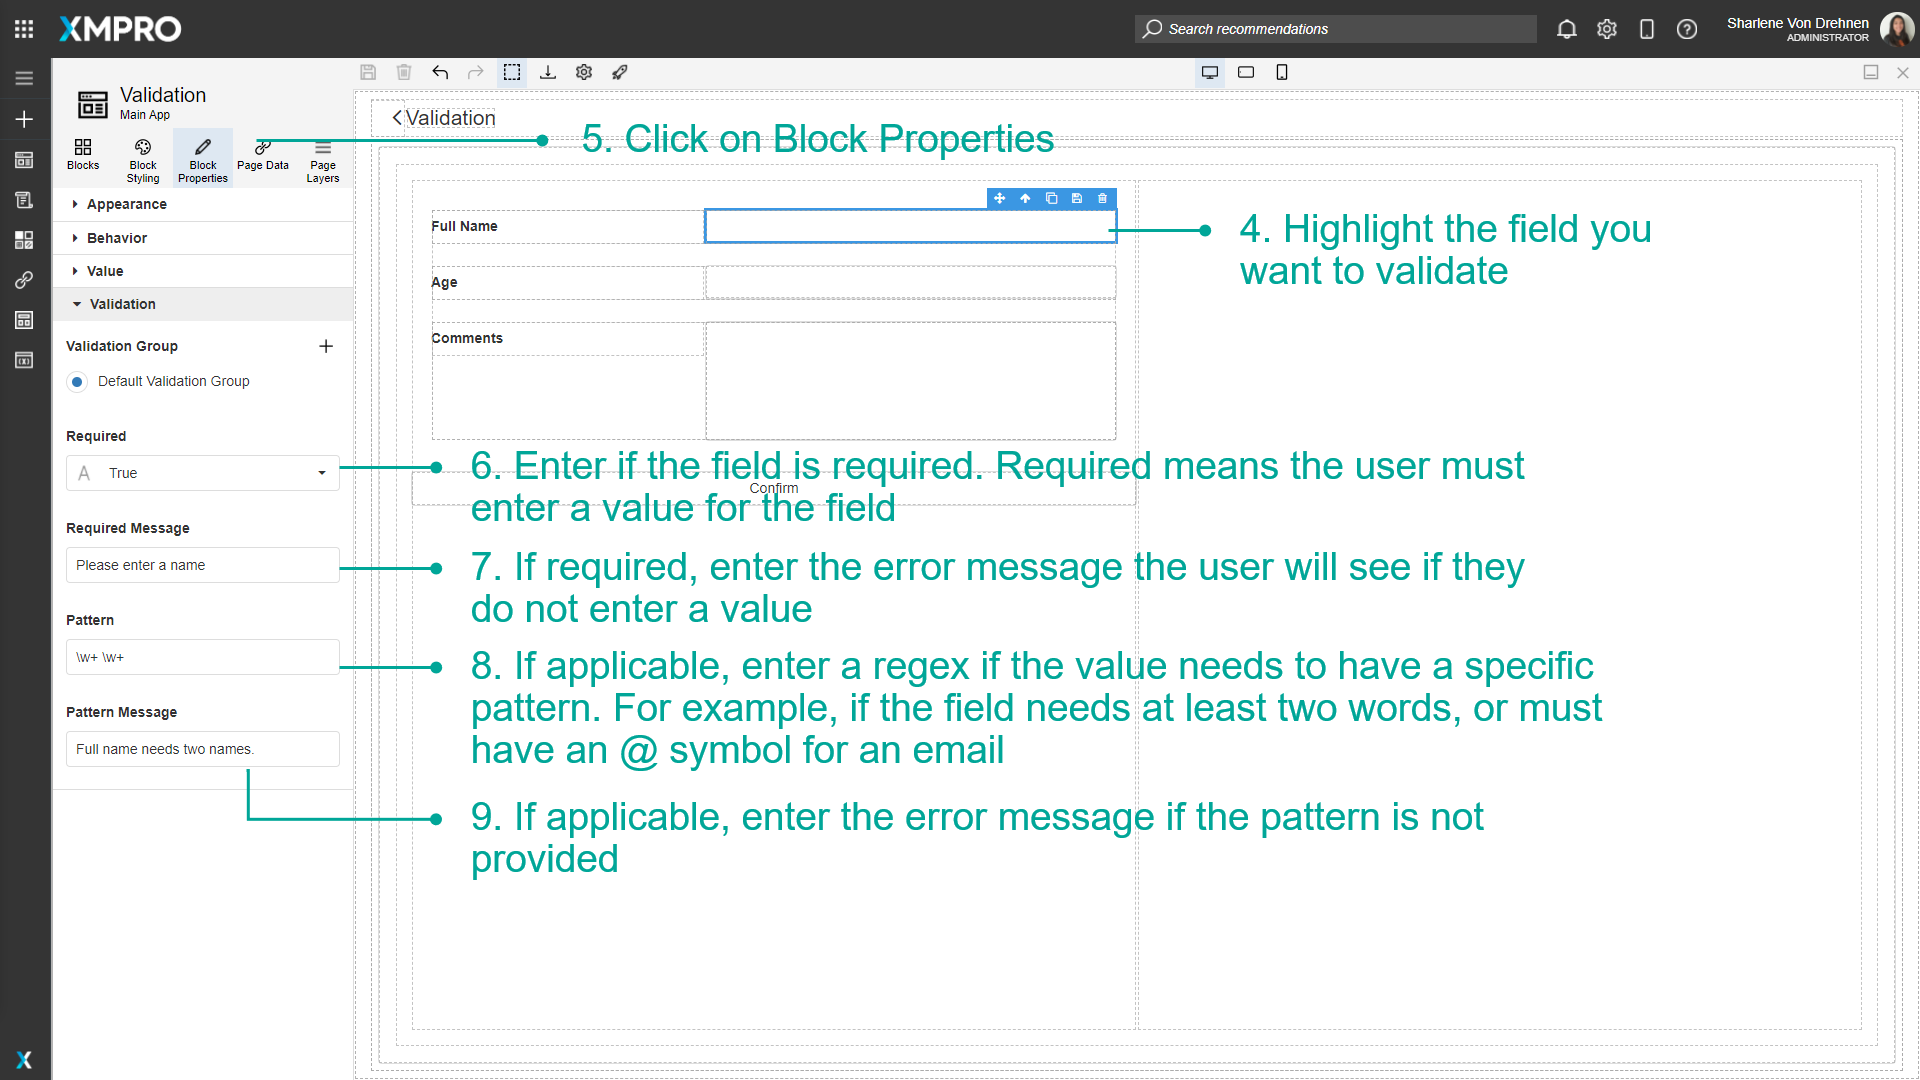
Highlight the field you want to validate.
Click on Block Properties.
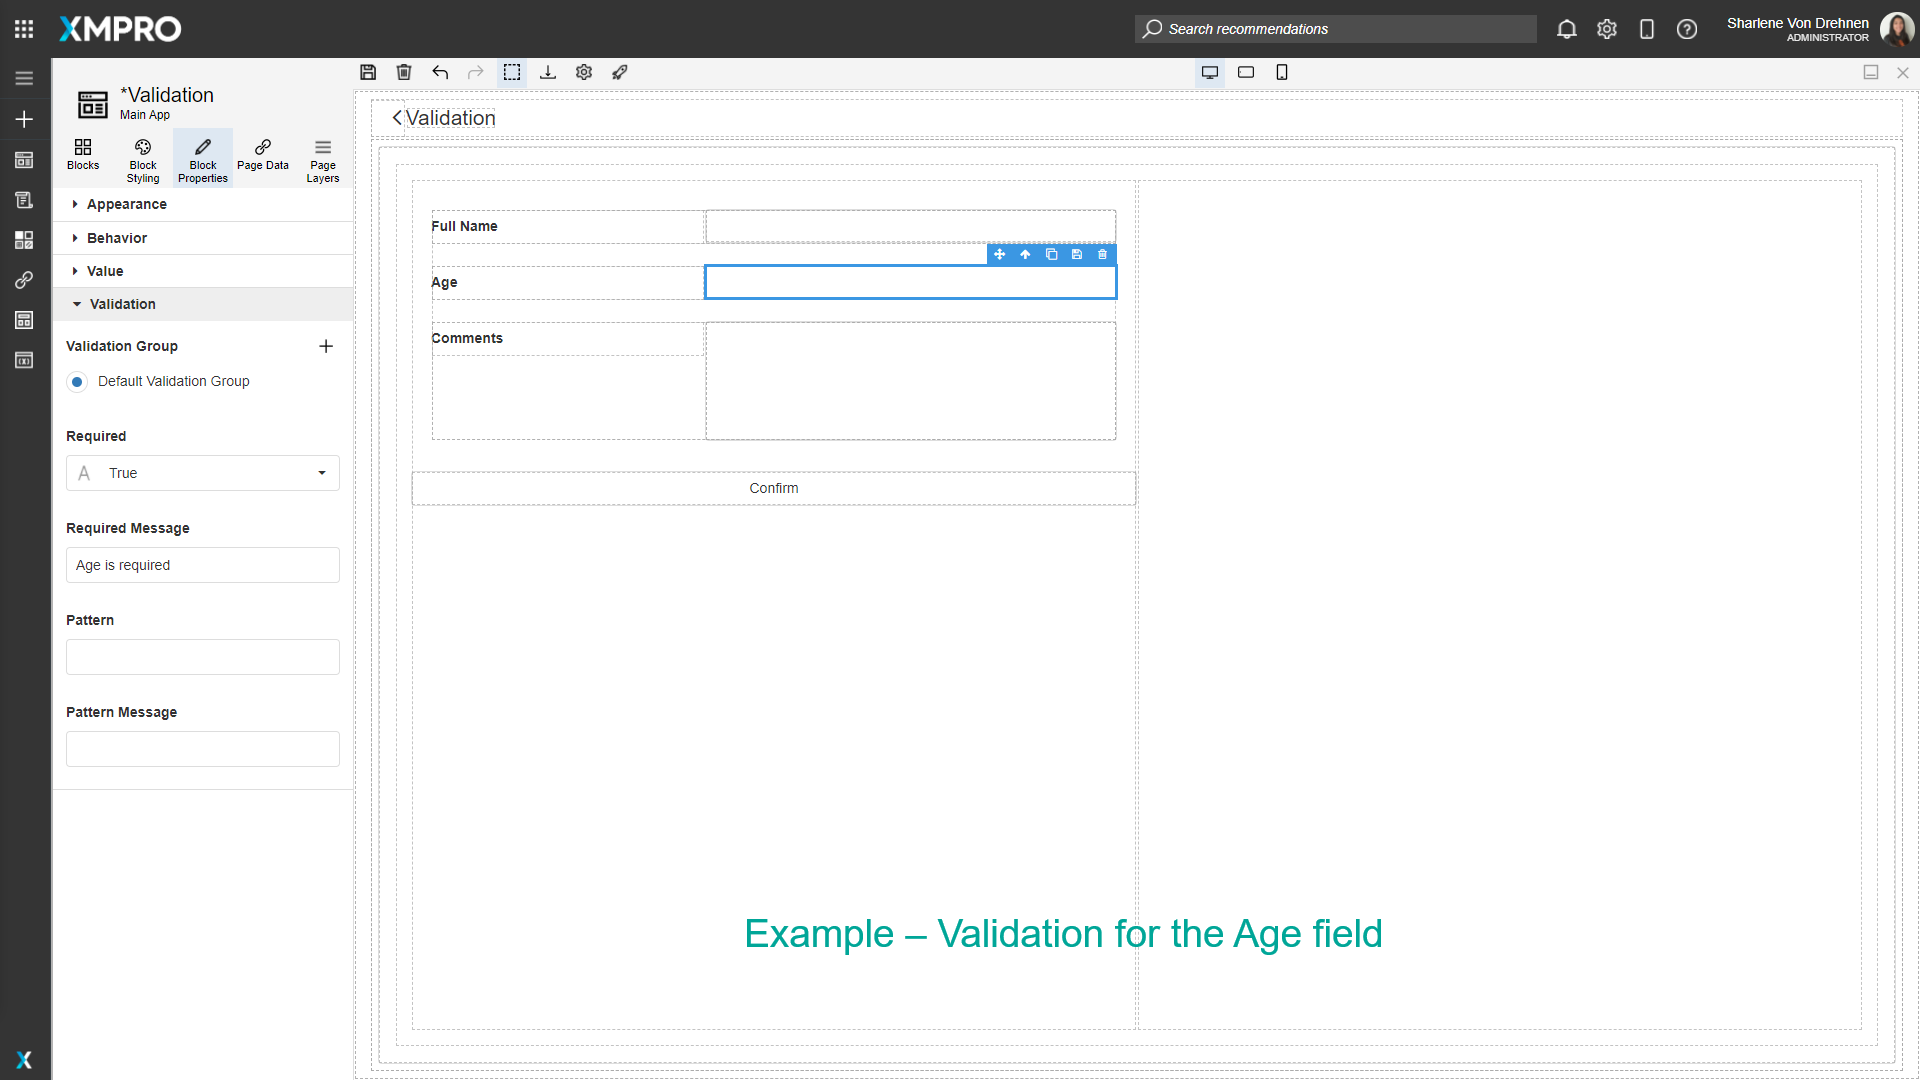
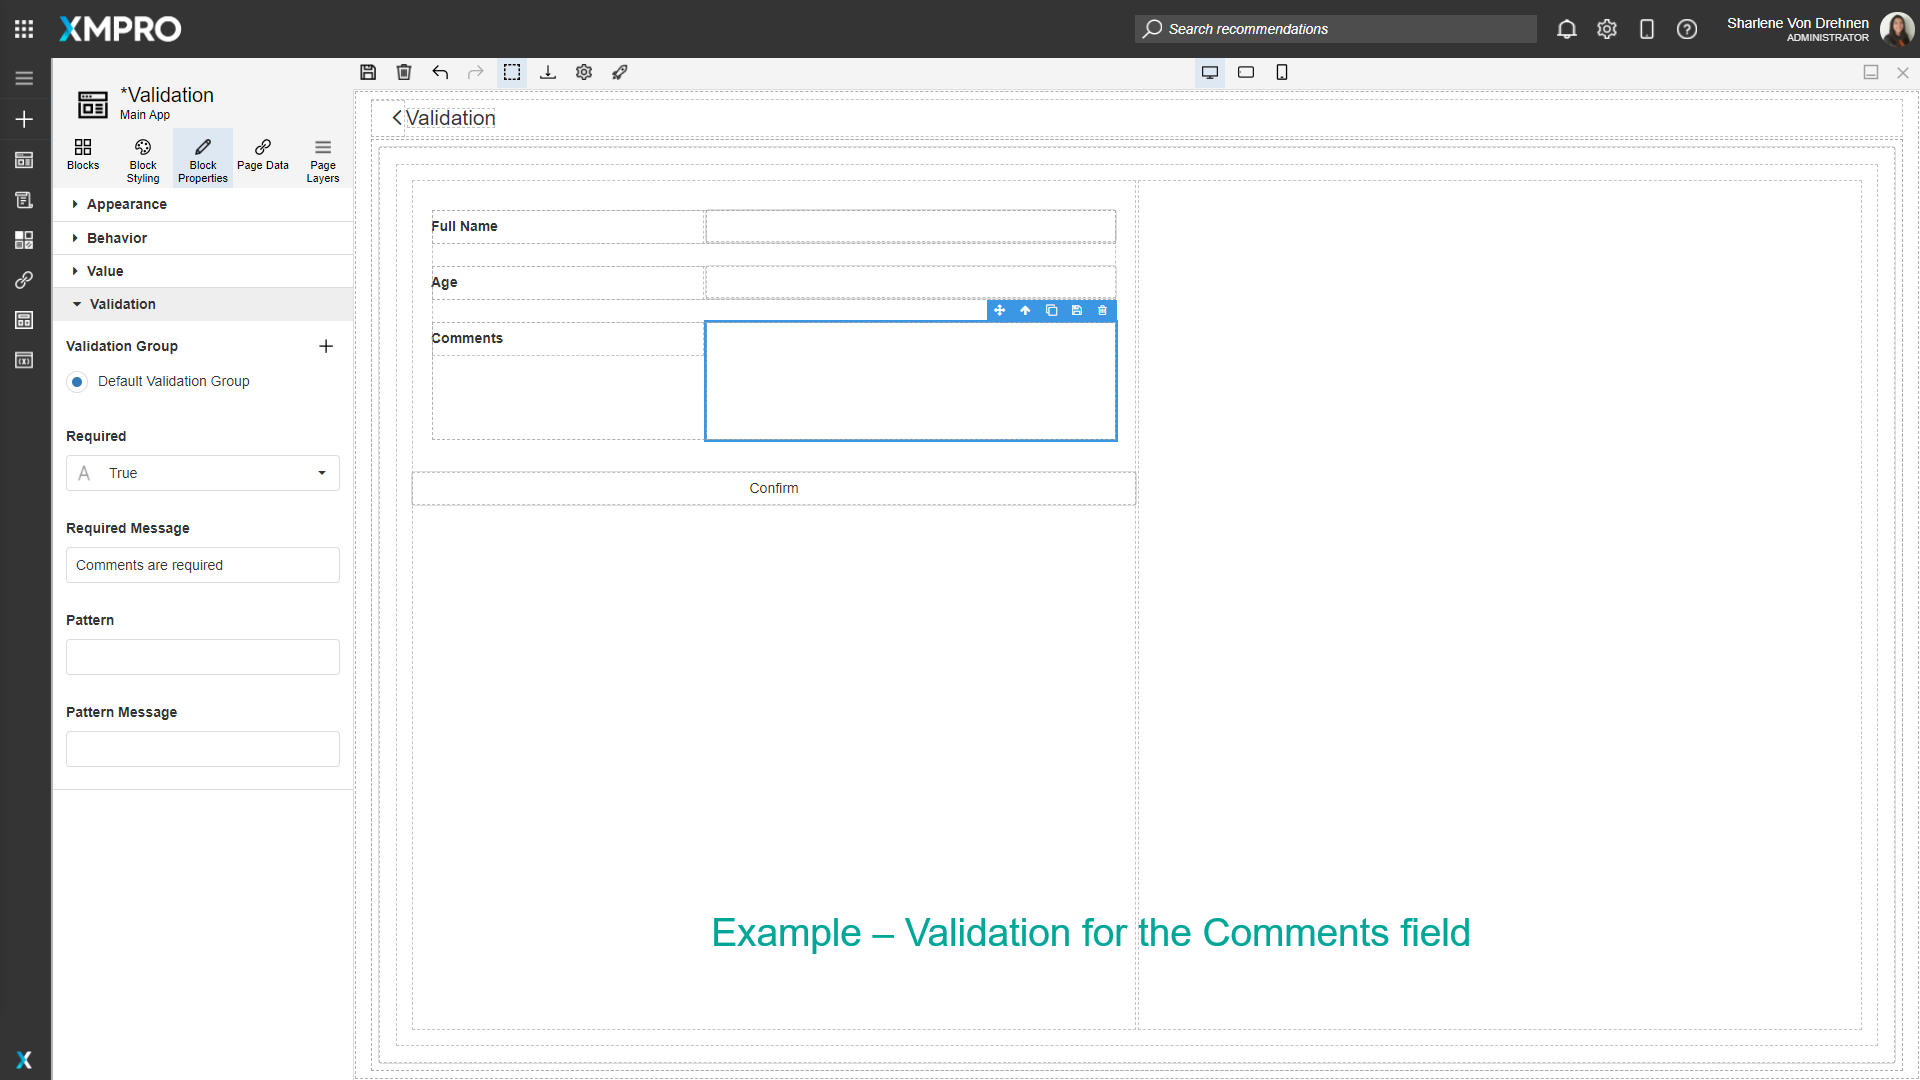
Enter if the field is required. Required means the user must enter a value for the field.
If required, enter the error message the user will see if they do not enter a value.
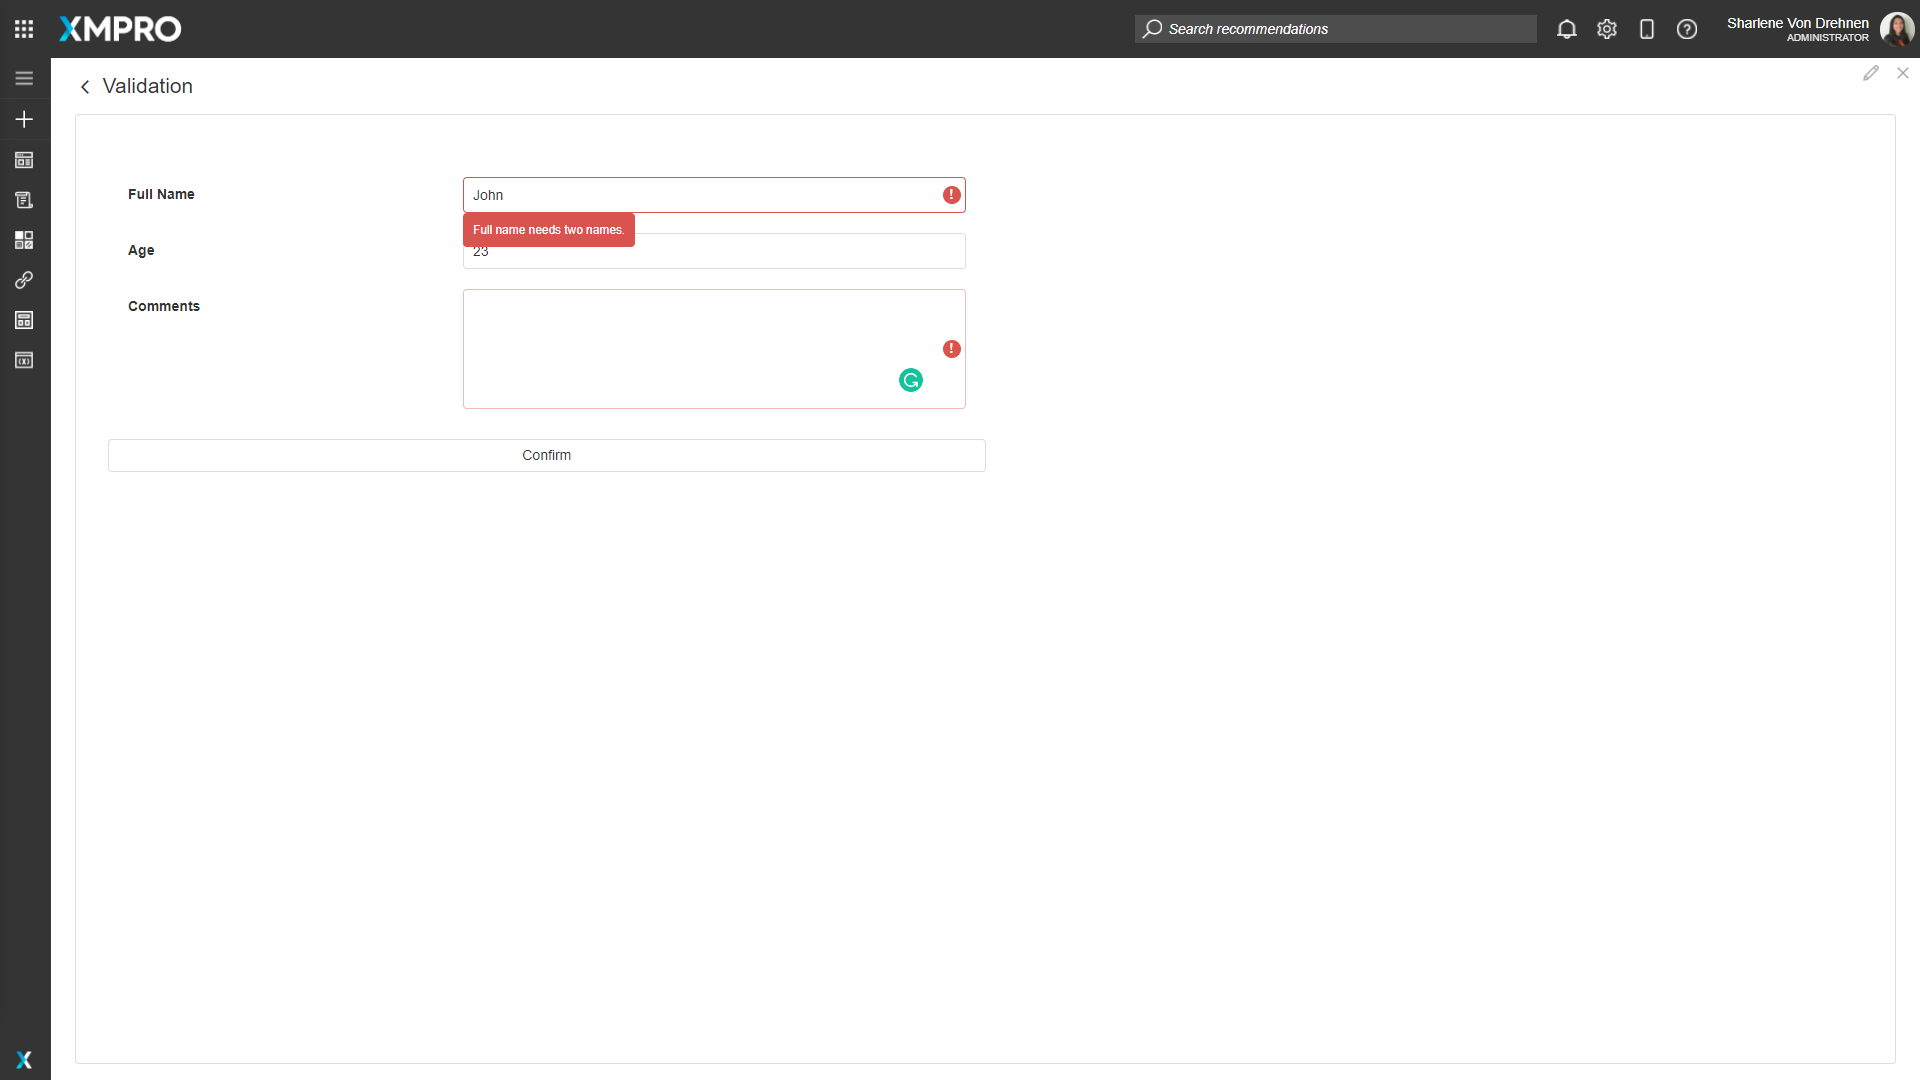
If applicable, enter a regex if the value needs to have a specific pattern. For example, if the field needs at least two words, or must have an @ symbol for an email.
If applicable, enter the error message if the pattern is not provided.
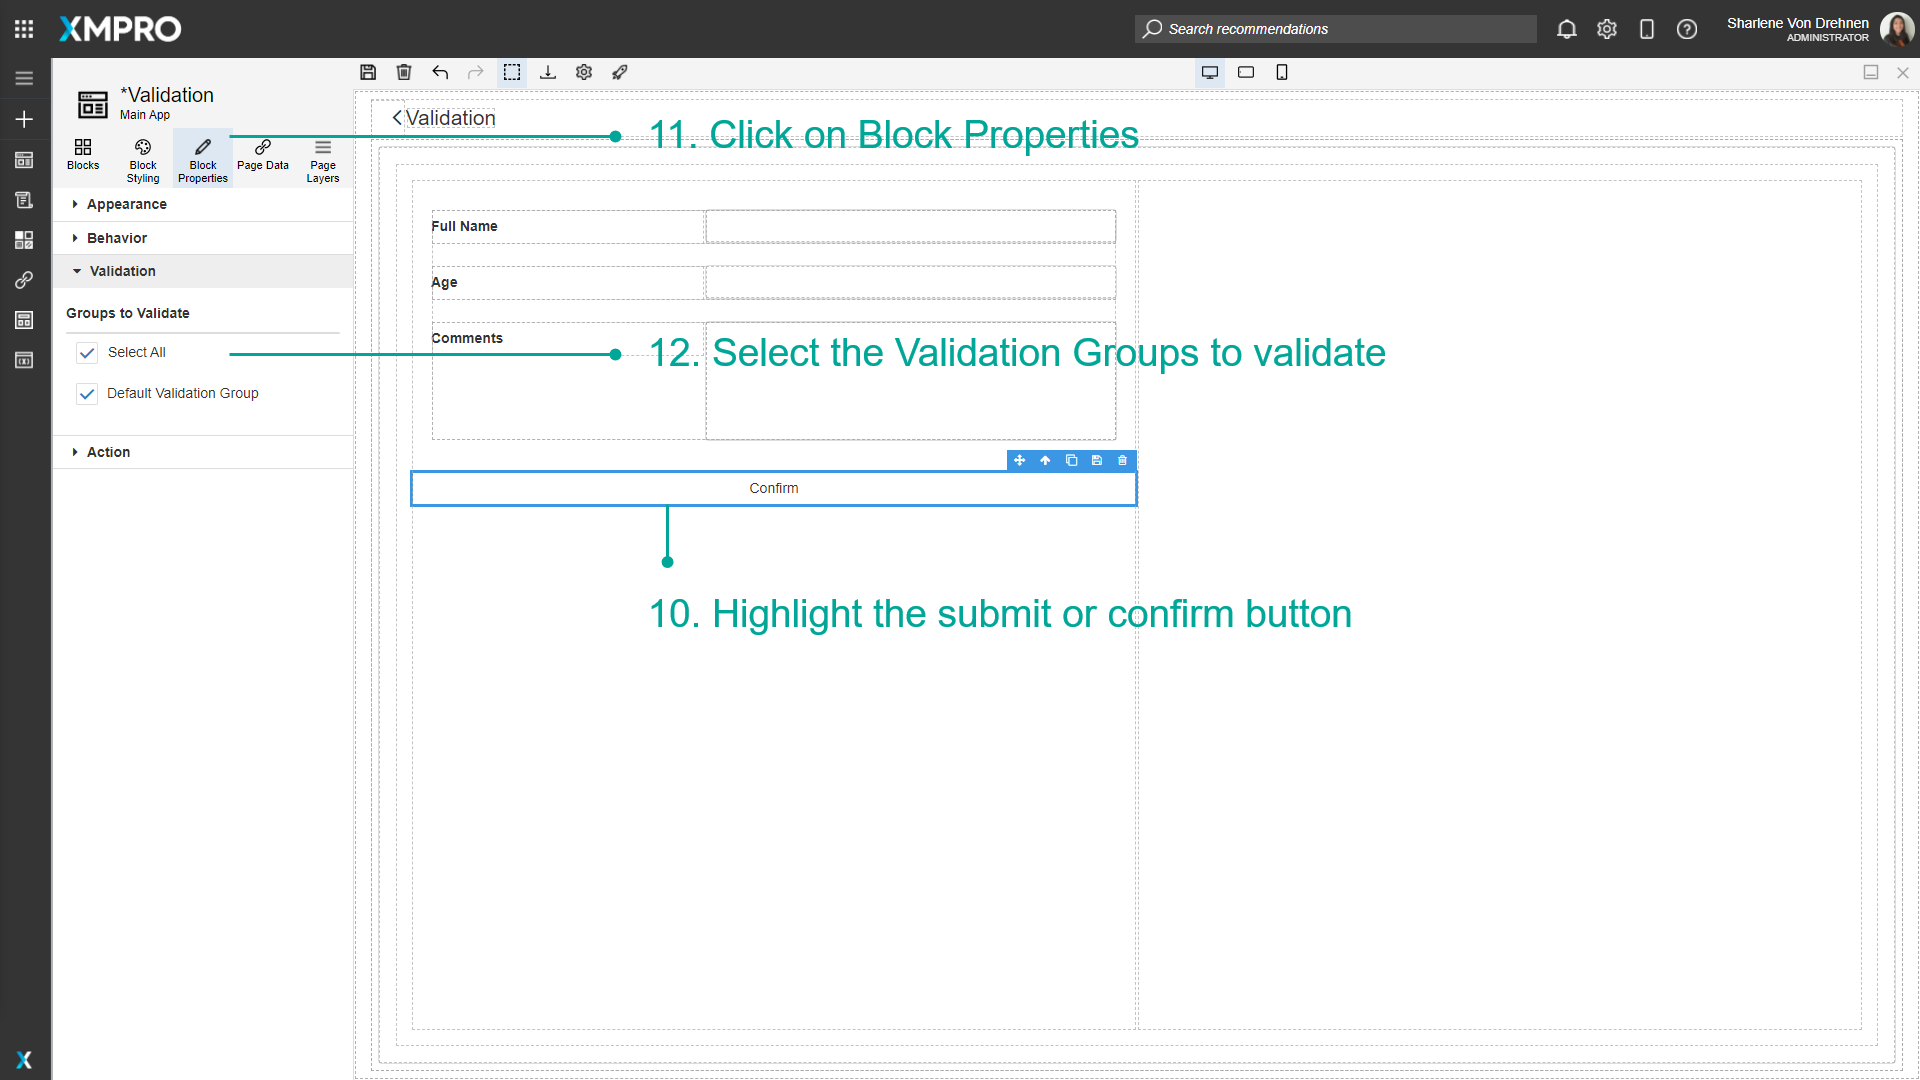
Highlight the submit or confirm button.
Click on Block Properties.
Select the Validation Groups to validate.
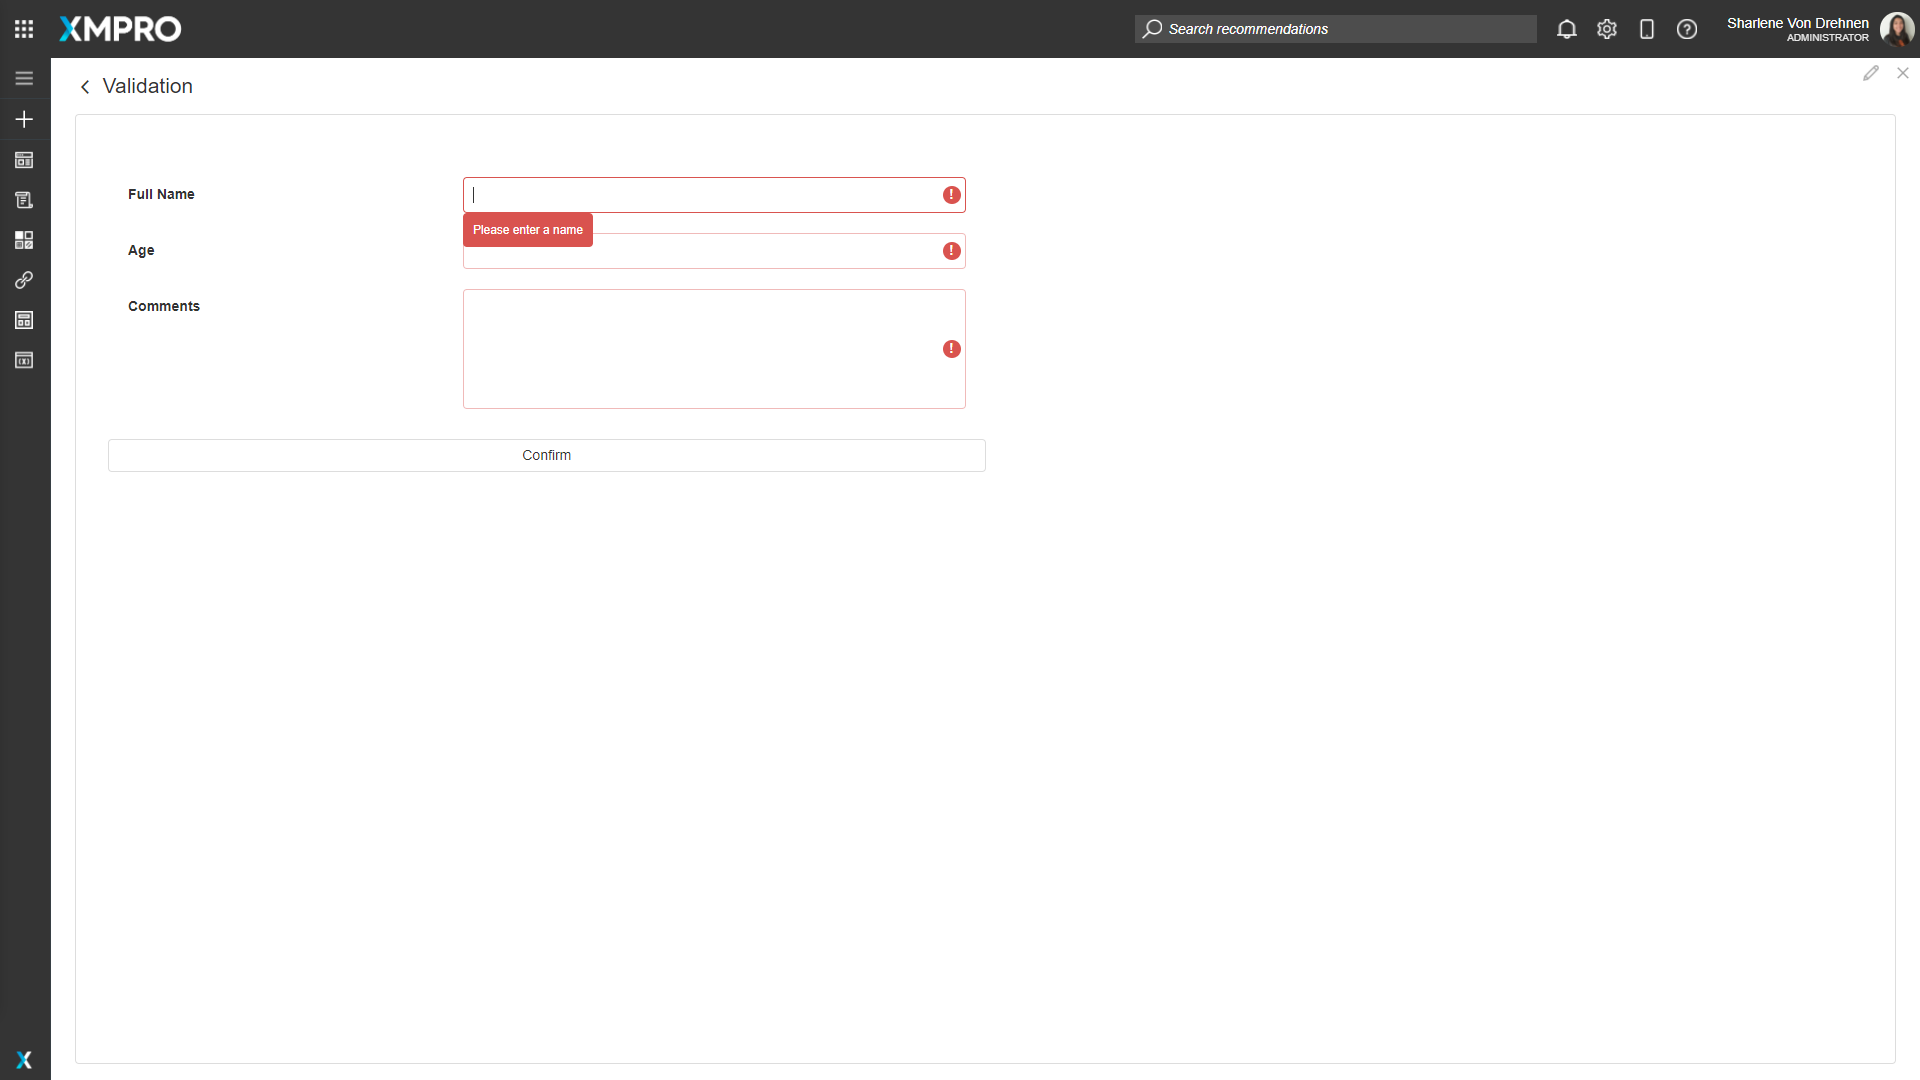
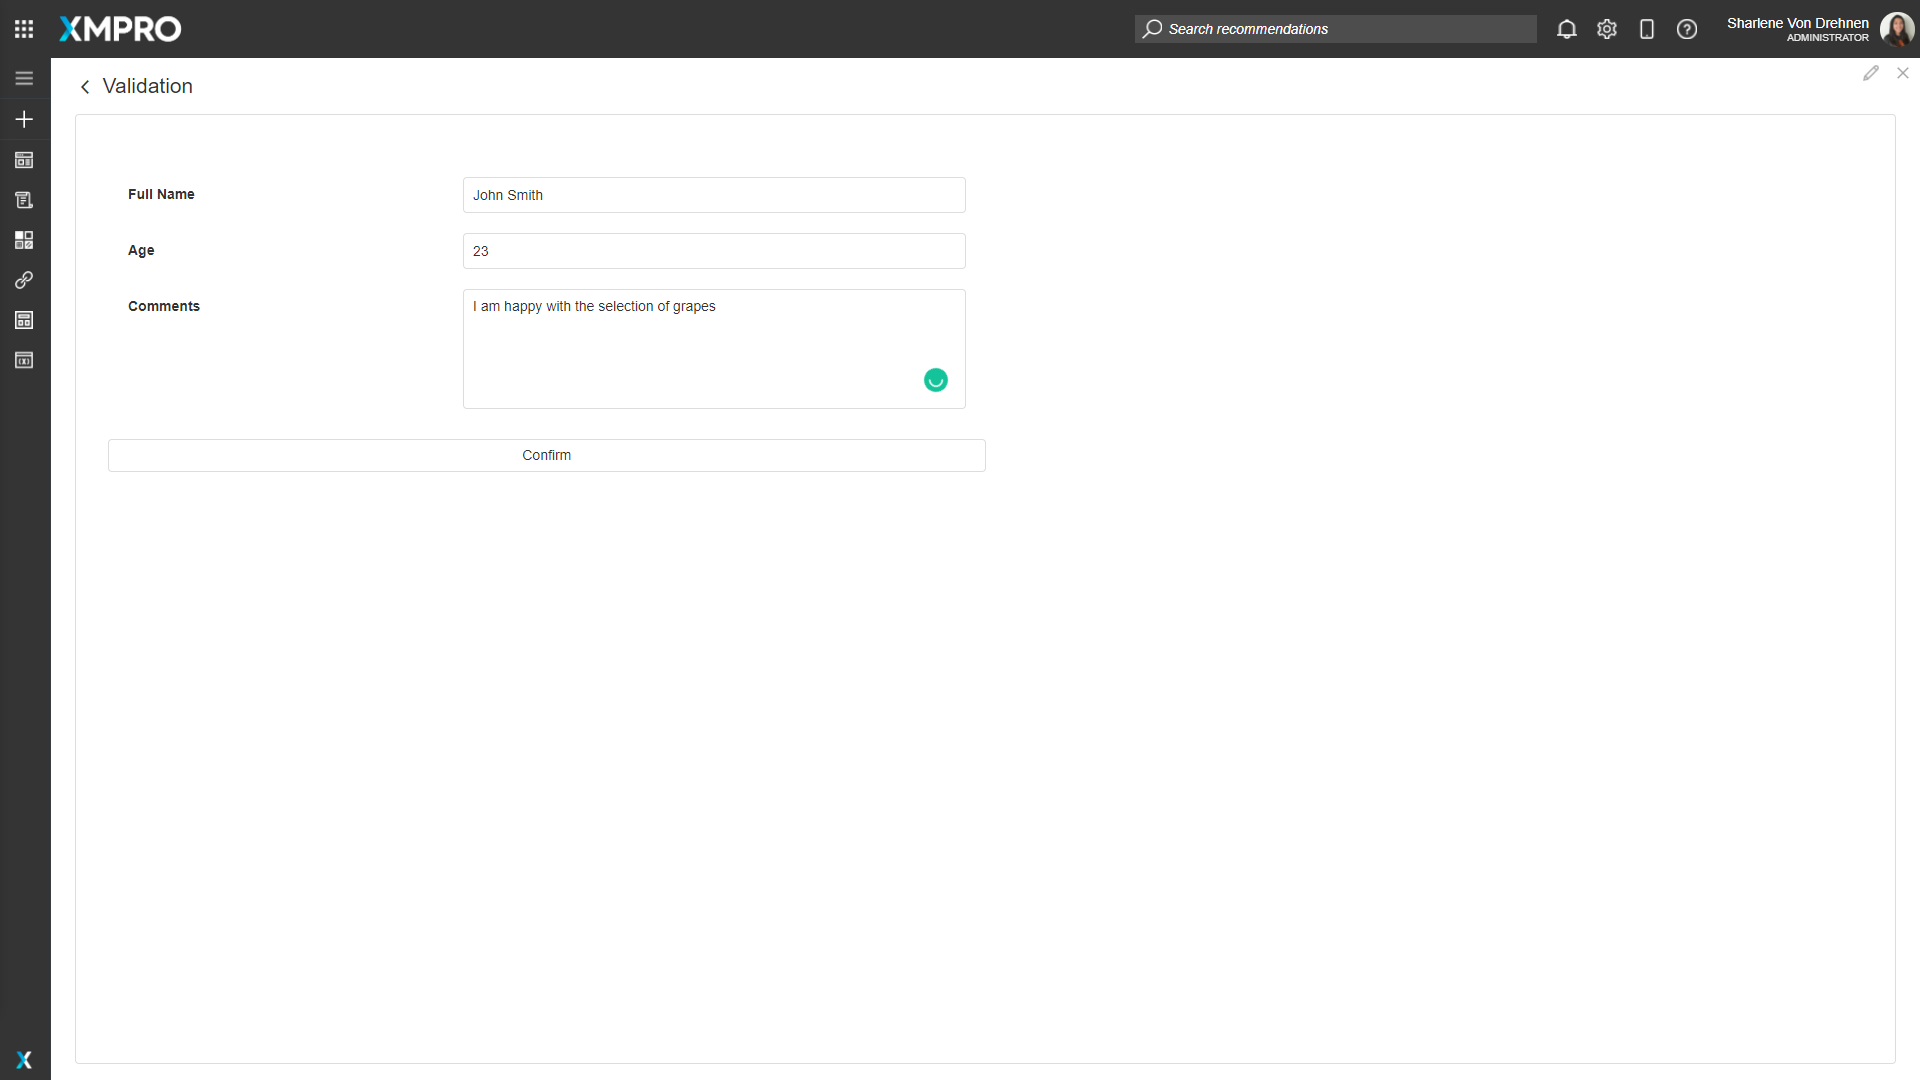
Viewing Validation at runtime
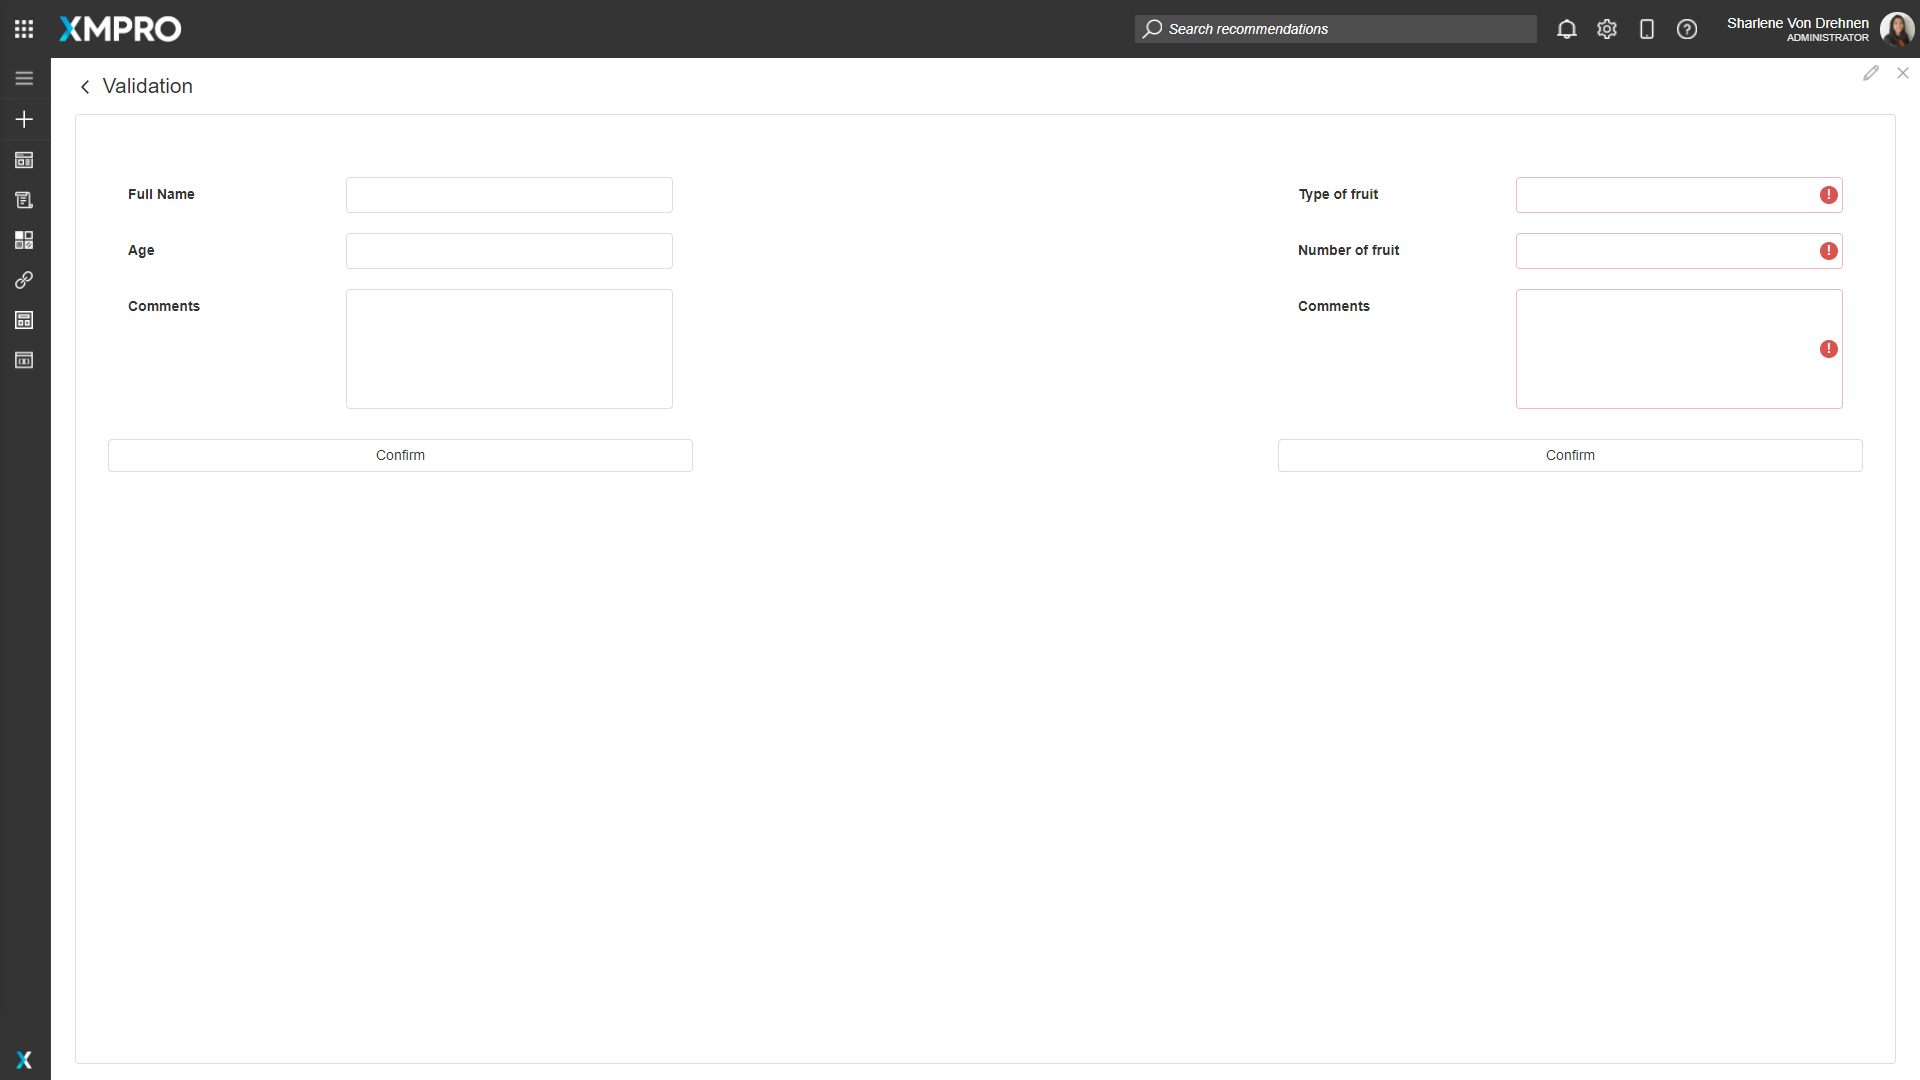
At runtime, if the 'submit' or 'confirm' button is pressed without valid inputs, the fields will be highlighted in red and the corresponding error warning will show.
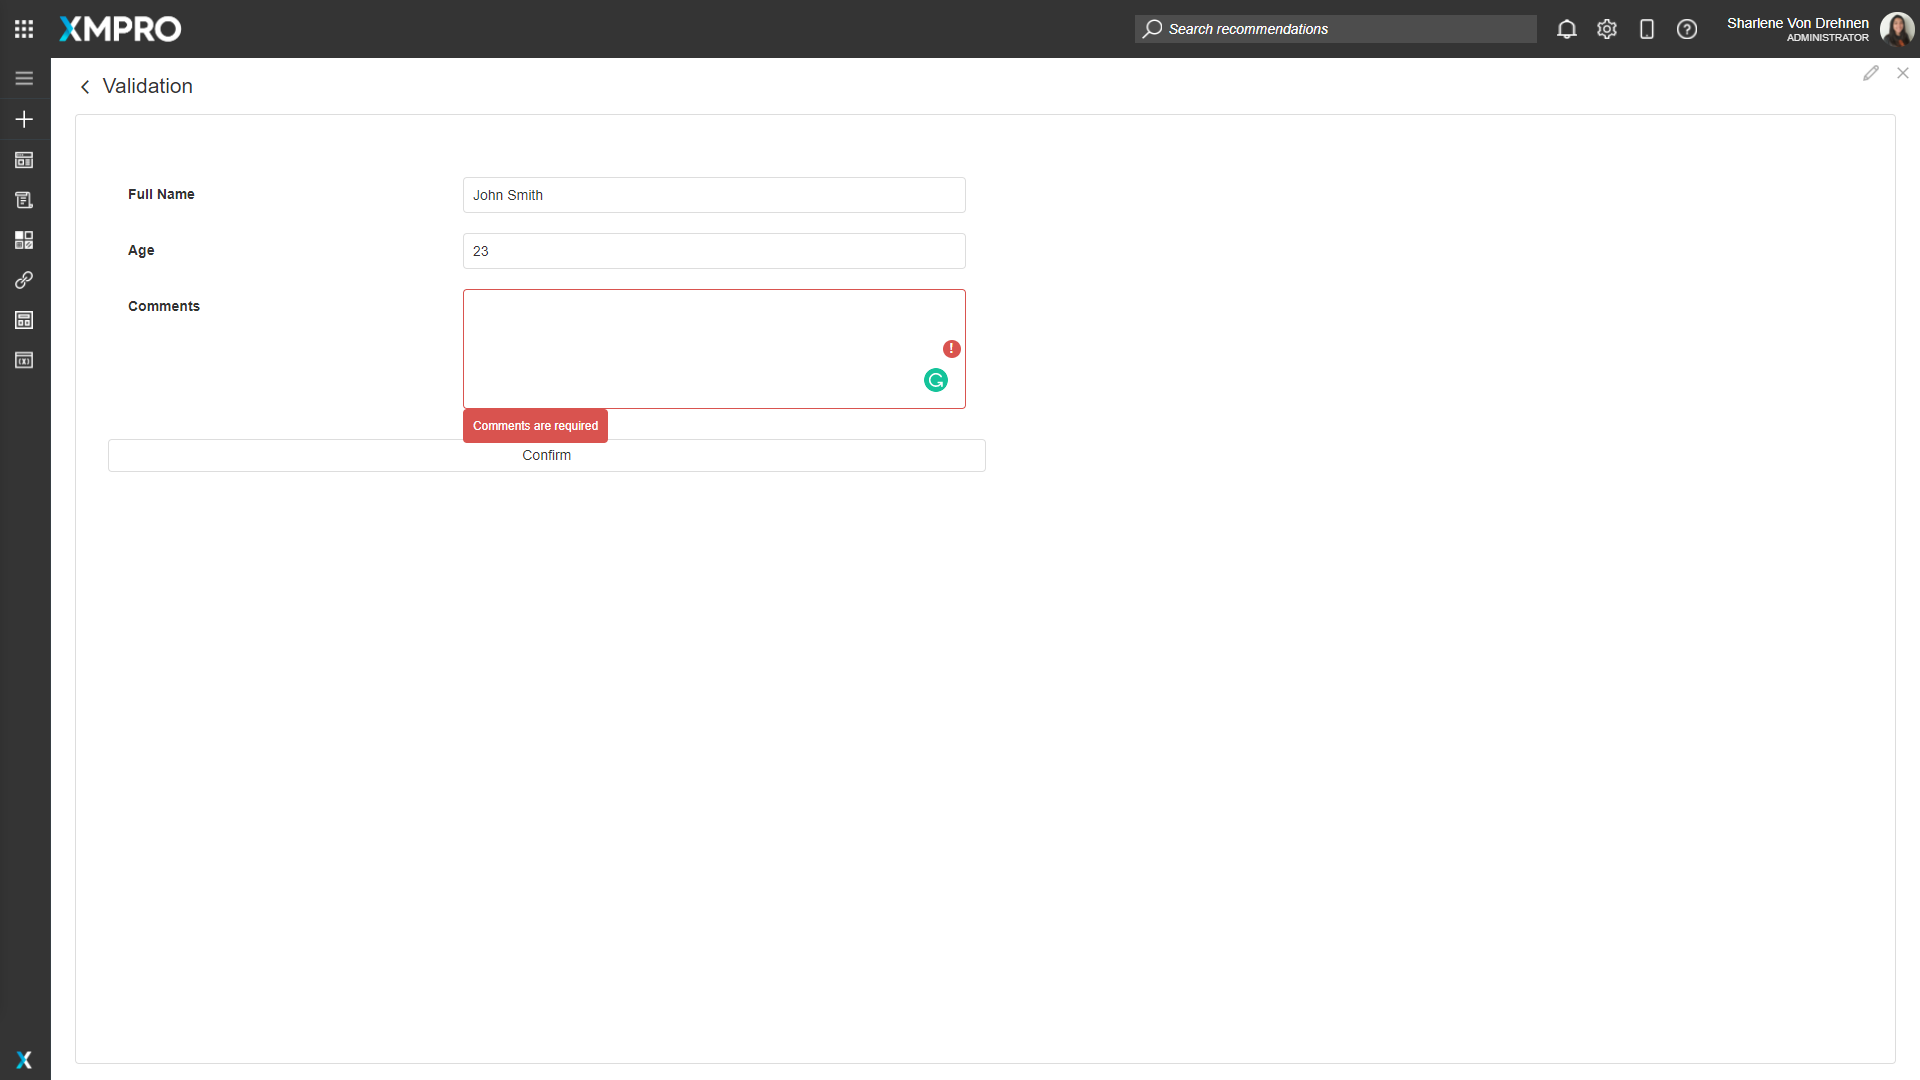
Once all fields are valid, all errors will disappear from the screen and the user will be able to press the submit or confirm button.
Validation Groups
Validation Groups can be used when there are multiple forms on the page that need to be separated.
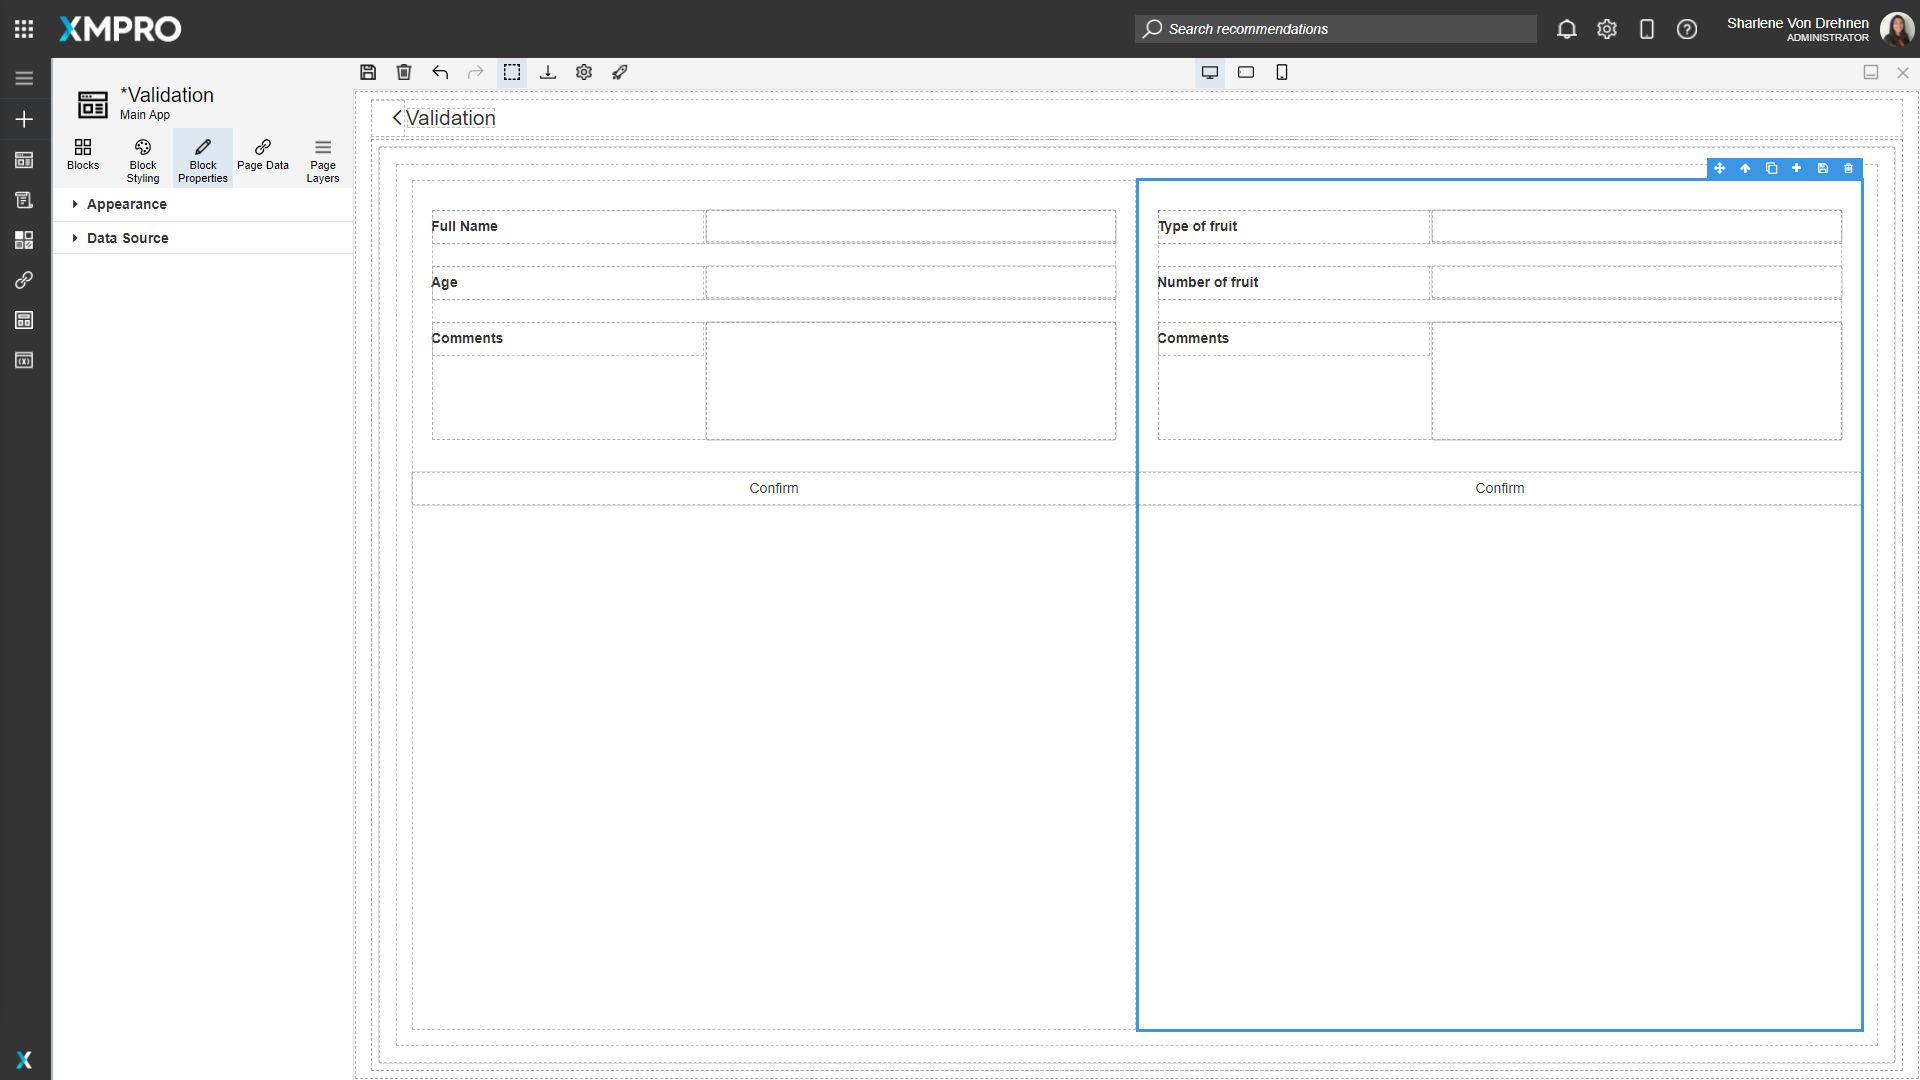
To organize validation groups, follow the steps below:
Select the field for the second form.
Click on Block Properties.
Expand Validation.
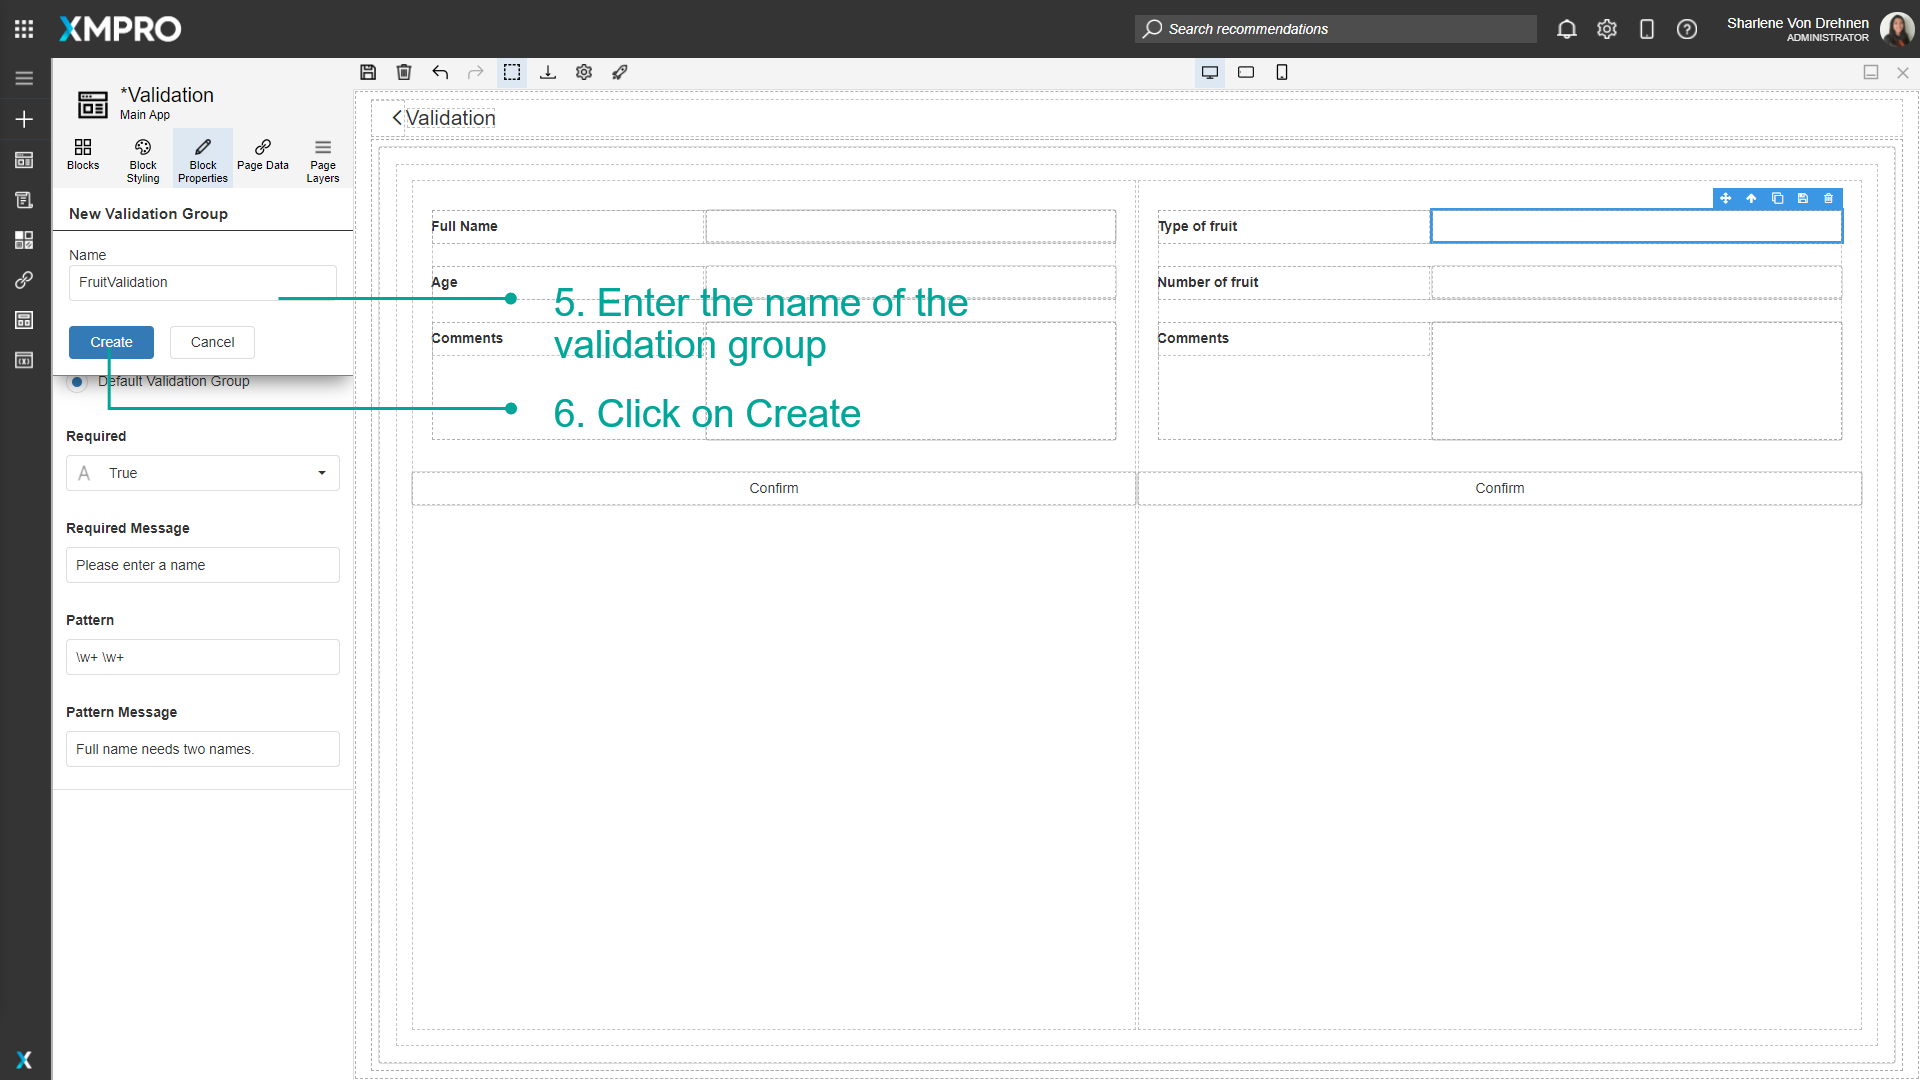
Click on the plus to create a new validation group.

Enter the name of the validation group.
Click on Create.
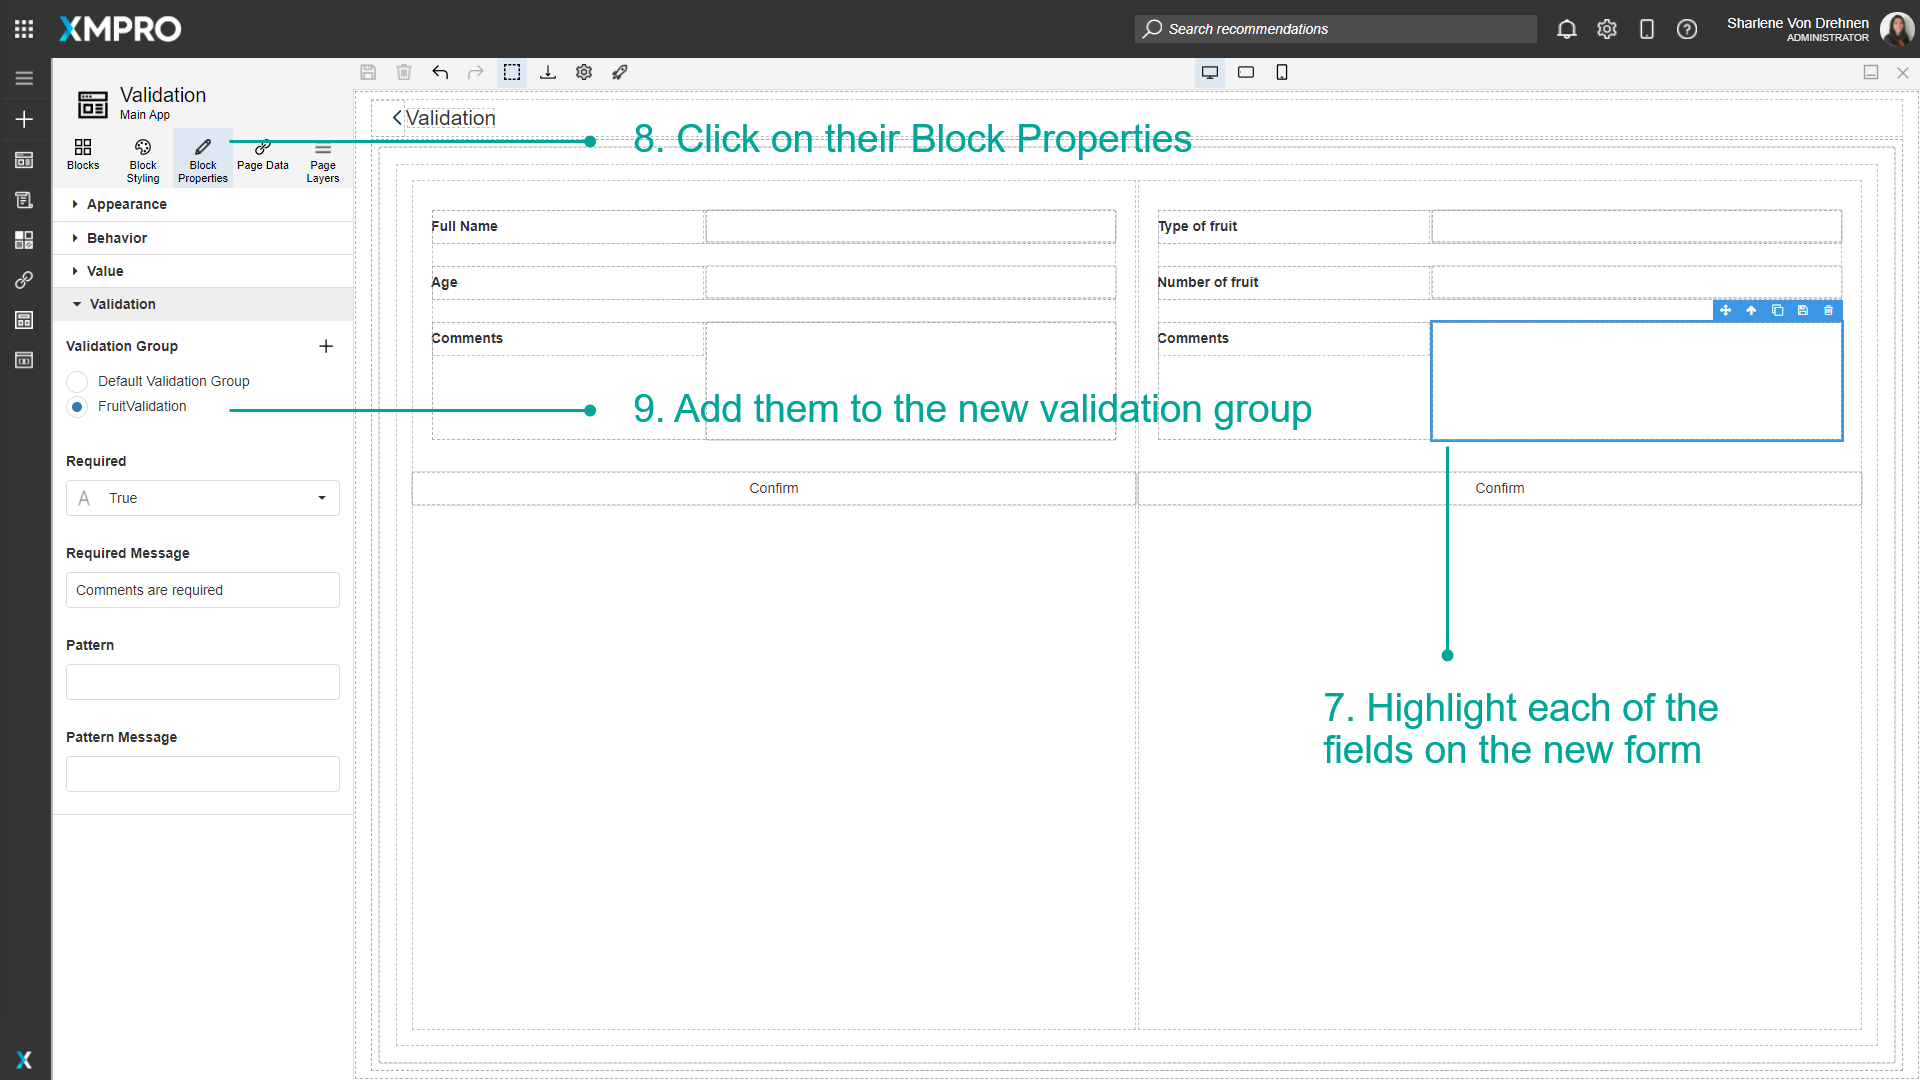
Highlight each of the fields on the new form.
Click on their Block Properties.
Add them to the new validation group.
Highlight the submit button for the new form.
Click on Block Properties.
Select the new validation group.
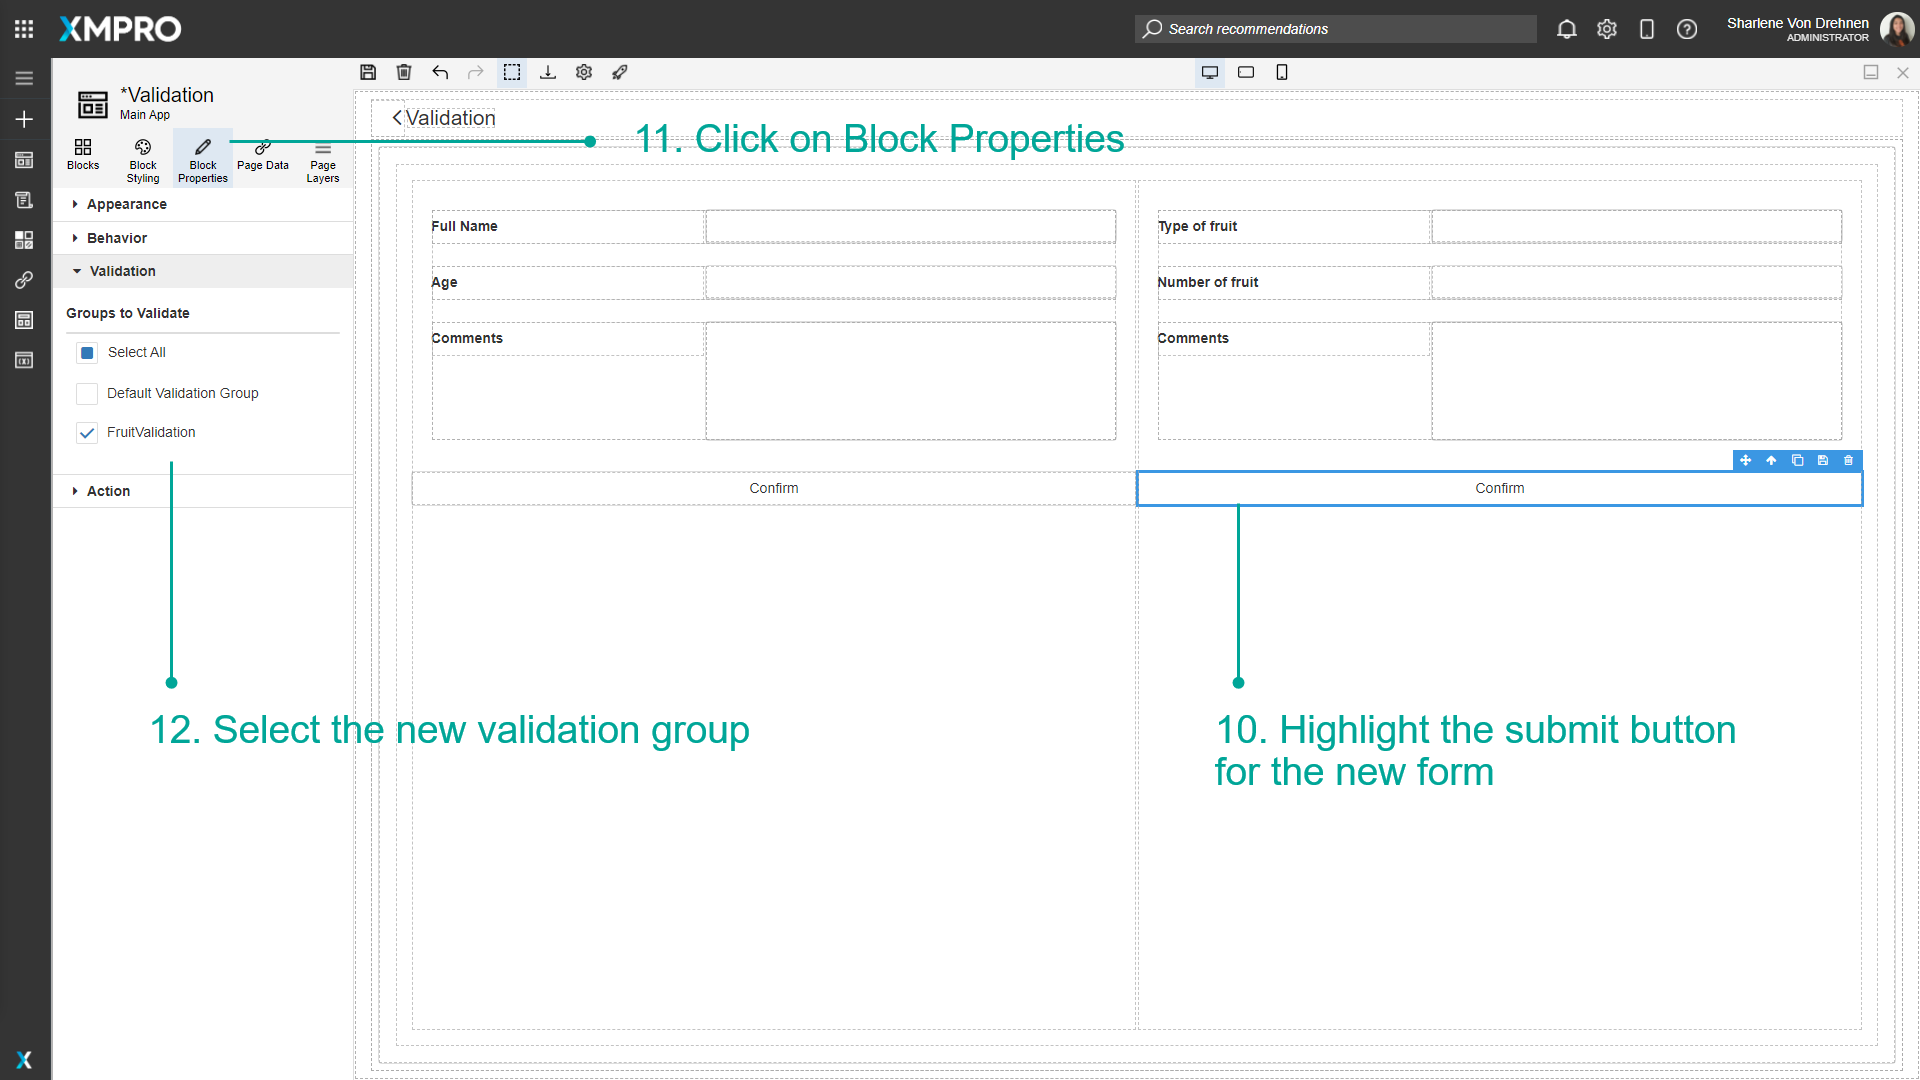
The validation will only be applied to that validation group.
Last modified: June 04, 2025